- Home
- Quilting Tools/Supplies
- Olfa Cutting Mat
A Practical Olfa Cutting Mat Guide - Why a happy quilter needs at least one
Self healing mats are a MUST for the savvy quilter!
This post contains affiliate links, for which I receive compensation.
An Olfa cutting mat is among the first purchases a new quilter makes, followed closely by the rotary cutter and ruler.
These quilting tools have allowed people (who otherwise would be turned off by the tedious cutting of patches one by one) to become quilters and to join in on the fun!
Now they're not cheap.
So here you'll learn about the importance of getting a 'self-healing' mat, advice on the size to purchase and tips and tricks to care for and prolong the life of this costly quilting tool.
What makes an Olfa cutting mat special?
This rotary cutting mat is specially made to use with a sharp rotary cutter. Its slightly rough texture helps keep the fabric from shifting while you cut.
When a cut is made on a "self healing" mat with a sharp blade, the cuts tend to close up.
Your blades don't dull as fast.
And your mat essentially "heals" itself and will be good for years of rotary cutting. To extend its life, simply remember not cut in the same spot all the time, or the same direction.
One side is marked with a grid; the other is unmarked.
Most are reversible, meaning both sides are self healing and can be cut on.
The usual exception to this are the rotating mats (shown further below).
Use both sides and extend the mat's useful life. Some standard rotary cutting mats don't have two cut-able sides—just check the label on your new mat if it's not an Olfa.
Can you use the lines on your Olfa cutting mat for cutting patches?
If you plan to use the measurements on the mat for cutting strips, squares and other shapes, then take the time to compare each of your ruler(s) to the lines on your mat(s).
That "rule" sprung up because sometimes the lines on both aren't equal.
If you've had to cut patches, some with the lines on the mat, some with the lines on your rulers, and they're not exactly the same and your patches can't possibly stitch together nicely.
So, if the lines on your rulers match the lines on your cutting mat...go for it!
If not, then choose the lines on your ruler. They're more versatile.
What size should you get?

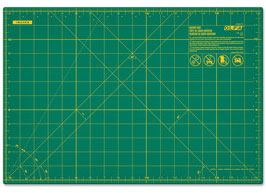
For a beginning quilter buying that first mat, we recommend the 24" x 36" size, if at all possible and if your work space is big enough.
It's easiest to cut fabric strips on because you fold your fabric only once.
As your selection of quilting tools grows, you'll add other sizes. Promise.
18" x 24" is nice for class or bee. A small one is good next to your machine for quick trims.
Lucky enough to have a dedicated cutting table? They make a huge Olfa cutting mat for that, too!
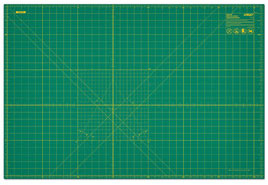
24" x 36"
The first mat a beginning quilter should buy!
You can cut yardage that is folded once, selvedge to selvedge and avoid cutting the dreaded 'dog leg'.
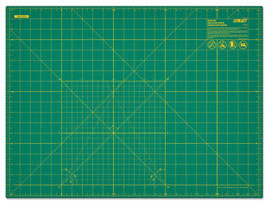
18" x 24"
If you are short on worktable space, you can also cut fabric folded once with this mat.
Personally, if you have the room I prefer the 24"x36" above. You can make more cuts before having to readjust the fabric.
12" x 18"
The perfect size for trimming smaller units and blocks.
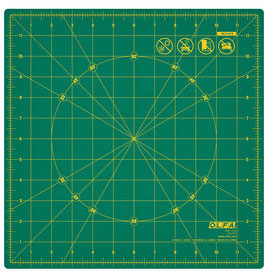
Turn the mat instead of turning the fabric. If you're a beginner, this is the second mat I'd buy.
Spinning or Rotating Mats
I own and LOVE the 12" size of this mat. It's perfect for trimming my paper pieced units down to size. There's a lot less shifting than with the 12"x18" mat shown above.
This mat also comes in a 17" square version (which I luckily received for Christmas!)
Due to the way this mat spins, it is not reversible like the other Olfa cutting mats.
Olfa cutting mat care and troubleshooting
OLFA Cutting Mats love moisture!
It is recommended that you soak your mat from time to time. Your self healing mat loves moisture.
To soak it, put your mat in a bathtub or large container (would have to be large so it can lay flat) and soak it for 15-20 minutes in a solution of 1/4 cup white vinegar to every gallon of cool water. Let me repeat, cool water. Do this every so often to help extend its useful life.
Then use a squirt of mild dish washing soap (Ivory) and clean the mat with a mushroom brush (soft is the key word here). The purpose of this gentle scouring is to remove the fibers that get trapped in the cuts marks preventing the cuts from "healing".
Keep 'em clean, keep 'em moist, keep 'em flat and NO heat. Your cutting mat is not a coffee cup coaster!
Phew!! My mat STINKS. How do I get rid of the odor?
Olfa recommends that you wipe the mat with a solution of equal parts of water and white vinegar. Let the mat sit for a few minutes. Rinse the mat and dry with a towel.
Repeat as needed.
I've used my mat for other fabrics, and now it's got "fuzz" on it.
Fleece fibers in particular are attracted to your self healing mat.
Clean your mat with a soft bristle brush (like a tooth or mushroom brush) and a solution of room temperature (not warm, not hot, not cold) water and a couple drops of a mild detergent.
Work into a lather to gently clean the mat.
Remember to rinse with, again, cool room temperature water and wipe dry with a clean towel.
My rotary cutting mat is warped? Can it be saved?
Olfa, on their website, says there is no proven way to fix a warped cutting mat.
However, many people swear they can fix a warped mat by:
- Laying it in the hot sun on the sidewalk
- Soaking in hot water and then laying flat
- Storing between the mattress and box spring to flatten over time
Now this seems contradictory to me...
So I went to the expert...
Charlie Hanney, former owner of Olfa Deals, started in the business in 1974. You may remember him from many of the large quilt shows in
his Olfa booth.
I once posed the question to him, "Can a quilter fix a warped Olfa cutting mat?"
Before going further, he asked me to make the following perfectly clear:
The method he proposes will work about 85% of the time. It is not perfect. It is not guaranteed. But it is what he does and has had good results.
NOTE: This is NOT recommended by Olfa, the manufacturer. Olfa is not in the "fix-a-mat" business.
And now for Charlie's answer...
Step 1
Get a piece of heavy plywood 3/8" to 1/2" thick. Make sure it is not warped.
Step 2
Lay the plywood on concrete, and ONLY concrete, in a totally all day sunny area. The concrete is important!
Step 3
Put the damaged mat on the plywood.
Step 4
Using heavy plate glass (NOT WINDOW GLASS) which you may find on a table top, a dresser top, or shelf glass. Any combo, and cover the mat so that mat is completely covered. Not just the affected area...THE WHOLE MAT. The glass can extend over the edges of the mat.
Step 5
Leave this set up in the totally sunny area all day. No moving, no peeking, just leave it alone.
Step 6
Early the next day, after the mat has cooled over night, your mat should be straight.
Again, remember, this method works about 85% of the time to straighten a warped Olfa cutting mat. It is not guaranteed.
Warp prevention
Now, the best way to fix a warped mat is to not let it happen in the first place:
- Always lay the mat flat and never on its edge
- Don't iron on it
- No hot food or drink on it
- Be careful not to place it close to a heat vent
- Store it flat under the bed or couch or on a cutting table.
Take care of your Olfa cutting mat, keep it clean, use the whole mat and not just one spot, and you'll have this very necessary quilting tool for years to come.
Alternative to rotary cutting...
 The Go!
Just like everything else in quilting, there's usually more than one way to get things done.
Rotary cutting is no different.
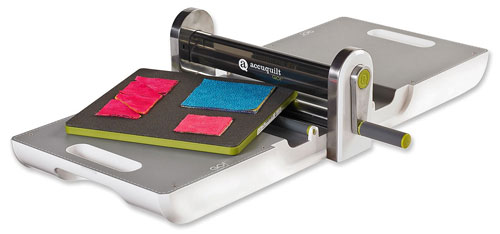
In the last several years fabric cutting machines, like the Accuquilt and Sizzix, were introduced, providing a new way to cut multiple layers of fabrics with a turn of the handle. Click here to learn more.
More Olfa Cutting Mats to choose from...
Olfa offers two other kinds of mat. One for traveling and one for a Quilting-Boss.
Foldable mats
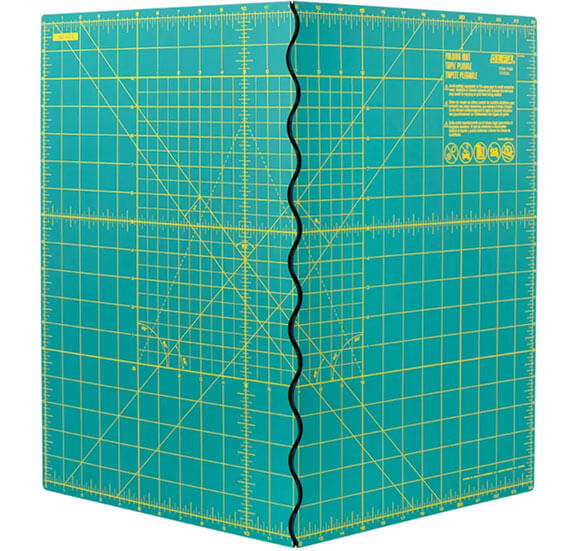
Just as the name suggests, this type of cutting mat folds in half to make it smaller to pack.
A wavy split between the two halves runs down the center of the mat. This ensures smooth cuts. If this join was straight, you'd run the risk of getting your blade stuck in it.
There are two sizes:
12" x 17" (folds to 9"x 12")
17" x 24" (folds to 13" x 17")
These mats are available from FatQuarterShop.com and Amazon.com.
Extra large Olfa cutting mats
If you're lucky enough to have a dedicated sewing room, you might have a cutting table large enough for this beauty.
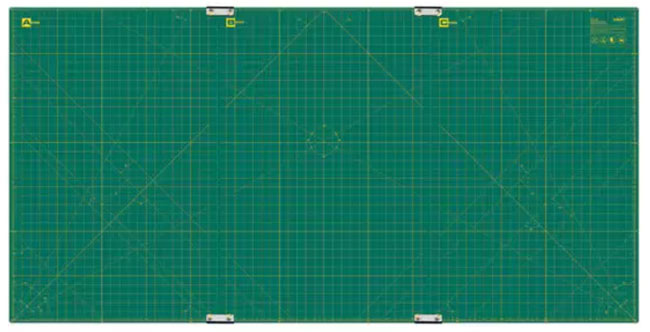
It's 35" x 70" of self-healing rotary cutting mat goodness brought to you by Olfa.
It comes as a set of three separate mats—each 23½" x 35"— that clip together to form a 35" x 70" cutting surface.
This system of clipping the mats together offers the stability that just shoving different mats together doesn't provide. It also is easier to store the individual pieces flat if you need to.
This mat is available from Amazon.com.
Does the separation between the mats cause a rotary cutter to skip?
I have both the foldable and the 3-section Olfa mats and have had no issues with the rotary blade missing a thread or two as I roll it over where the mats meet!
- Home
- Quilting Tools/Supplies
- Olfa Cutting Mat
