- Home
- Quilt Design Inspiration
- Rocky Mountain Chain Quilt
Inspiring Layouts for a
Rocky Mountain Chain Quilt
From our Quilt Design 101 series...you love the block...now what?
This post contains affiliate links, for which I receive compensation.
You've finished your Rocky Mountain Chain quilt blocks.
Waiting for inspiration to strike?
Nothing like a little help getting those creative juices flowing!
Below you'll find 6 different layouts as well as a real 'dud'—sometimes figuring out the duds ahead of time is the really valuable stuff.
Underneath each Rocky Mountain Chain variation are the number of blocks in each horizontal row and vertical column, i.e. 5x7 means a layout of 5 blocks across and 7 down.
For blocks set on point, the total number of full blocks needed is shared along with the number of half and quarter blocks used to complete the quilt.
The finished size includes 1/4" wide binding. All sizes are finished sizes, i.e. 2" sashing is cut at 2-1/2" wide and finishes at 2".
Now let's get those creative juices flowing!

My Favorite Quilt Design Software
All the free patterns and block/quilt illustrations on this site were created in either EQ7 or EQ8—my favorite quilt design software.

This program makes it so easy to audition different
colors and values with just a few mouse clicks.
Rotate and flip the blocks with another series of clicks.
I can't imagine going back to graph paper and colored pencils.
Or worse yet—simply keeping my fingers crossed. Fabric is much too expensive!
The box contains a software download license—License ID and Password—and a booklet to get you through installation and get you started. There is no disk as in the past.
Download the software onto your computer from the EQ website using the ID and password as directed. At the time of download you can choose either PC or MAC.
I LOVE Electric Quilt!
I hope you do to.
Layout Options for a Rocky Mountain Chain Quilt
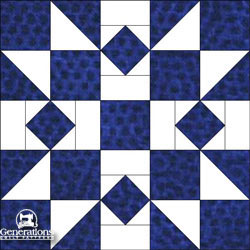 Rocky Mountain Chain
We'll use this version of the block in the first several examples. Lights and darks are in the same positions as in the original tutorial.
To make it easier to see the designs, the drawing lines around all the patches in each block are removed.
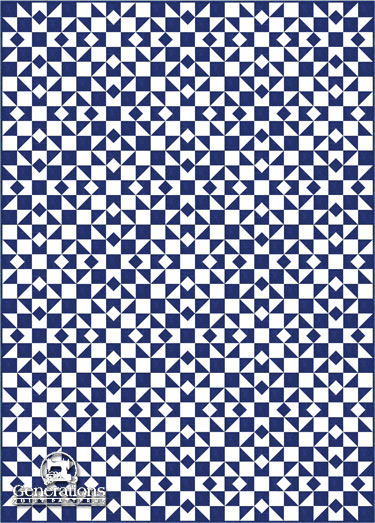
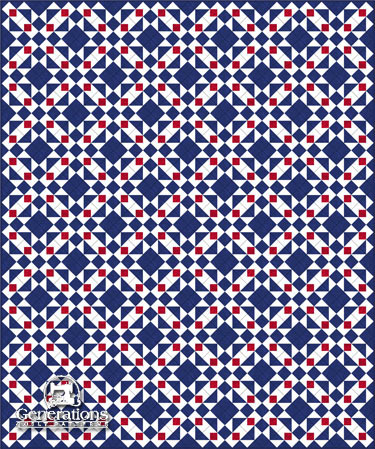
In this first one, our Rocky Mountain Chains are laid out edge to edge in straight rows.
To make matching the seams a breeze, remember to twirl the seam allowances in the corner units and press the final two seams as instructed here.
 5x7
5x750-1/2" x 70-1/2"
As the designer, you get to decide how your quilt comes together.
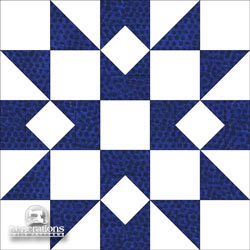
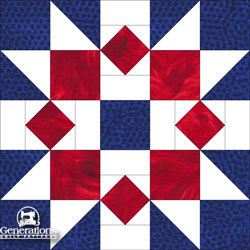
 Sawtooth Star
It's quite possible that with this one, you might forgo the Rocky Mountain Chain design altogether, choosing instead to create Sawtooth Stars with white points.
A pieced sashing and solid blue cornerstones are needed to complete the design.
Again, the software makes this pretty straightforward.
It really is up to you!
Sometimes you get partway through making a set of blocks. Suddenly you're just so OVER them.
Your work needn't go to waste.
Try a solid alternate block setting like this takes just a wee bit more than half the original piecing.
 5 by 7
50-1/2" x 70-1/2"
Just be sure to use an odd number of Rocky Mountain Chain blocks in both the rows and columns to keep the design symmetrical.
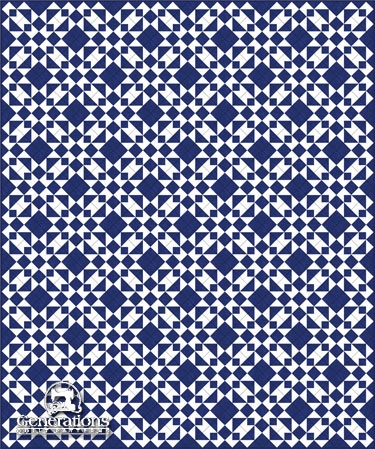
Adding 2" finished sashing strips and solid light cornerstones gives the design a bit of breathing room. It looks almost like snowflakes, don't you think?
 5 by 7
62-1/2" x 86-1/2"
2" wide sashing
Not every idea works out...
 The alternate block
...and this final straight setting turned out to be a real dud.
Again, one of the benefits of using quilt design software like EQ7 is being able to test out a design before cutting a single patch of fabric.
In this rendition, an alternate block is used that swaps the blue and white fabric placements in our original block.
Sometimes the results of this type of swap are stunning.
Here?
Not so much.
Your eyes struggle to interpret what they are seeing.
It's simply a 'hot mess'.
 5 by 7
50-1/2" x 70-1/2"
Do you agree?
On-point Settings
On-point, or diagonal settings can really jazz up a design. Our Rocky Mountain Chain is a terrific example of this.
On-point settings do tend to take more piecing. Remember there are half- and quarter- blocks to make to fill in on the sides.
Each of the designs presented in this section require the following blocks:
- 50 full
- 18 half
- 4 quarter
Here we've simply placed the blocks edge-to-edge on-point.
If you're having a time trying to identify the block, tilt your head 45° to the side. The large blue square is formed by the corners of four blocks meeting.
I love it when the block seems to disappear!
 5 by 6
70-3/4" x 84-7/8"

Same diagonal layout, just swapping out the center blue patch in the Square-in-a-Square unit for a red one. (The #1 patch from the tutorial.)
And here's the result.
 5 by 6
70-3/4" x 84-7/8"
Swapping such a small patch can make a big change in the feel of the quilt. Not quite as formal.
What if we add a bit more red—just one of the squares in each of the corner subunits?
Notice how much brighter this quilt seems.
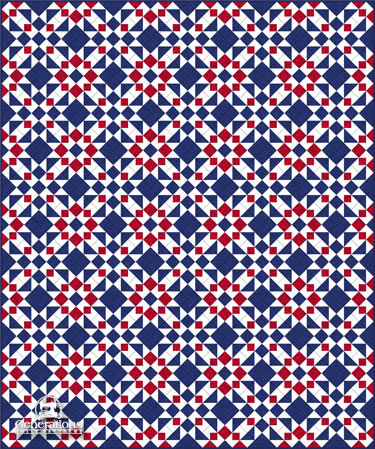 5 by 6
70-3/4" x 84-7/8"
It looks almost like flowers, doesn't it?
Now let's 'scrap' things up a bit!
Scrap quilts are a wonderful way to use up bits and pieces leftover from other quilts.
In this sample, the blues are replaced with scraps ranging from a royal purple-y blue to a light/pale turquoise.
 5 by 6
70-3/4" x 84-7/8"
Again, using Electric Quilt first has saved me a lot of trial and error.
To make this rendering really sing, the values of the blue fabrics (how light or dark they are) need to be closer together and on the darker side.
The design gets a little bit lost around the lightest patches here. Make sure to use a really light-light for the background to highlight the contrast in values.
Hopefully this has given you some ideas for creating your own Rocky Mountain Chain quilt!
Learn how to make your OWN
Rocky Mountain Chain quilt block
You'll find instructions to make this block in three different sizes—10", 15" and 20" finished—right here on the site.
If you've enjoyed this page of design inspiration, you're sure to appreciate Quilt Design 101.


By Julie Baird
Copyright © 2008-2026 Generation Quilt Patterns, LLC
All Rights Reserved
Generations-quilt-patterns.com does not sell any personal information. (See Privacy Policy)