- Home
- Free Quilt Block Patterns
- Chain Link Quilt Block
Chain Link Quilt Block
From our Free Quilt Block Patterns Library
This post contains affiliate links, for which I receive compensation.
Skill Level: Beginner
The Chain Link quilt block is deceptively simple.
No bias edges.
Just squares and rectangles.
To complete the block, you'll use a technique called 'partial seam' or 'puzzle piecing'—which means nothing more than the first seam partially sewn at the beginning and finally completed with the last one.
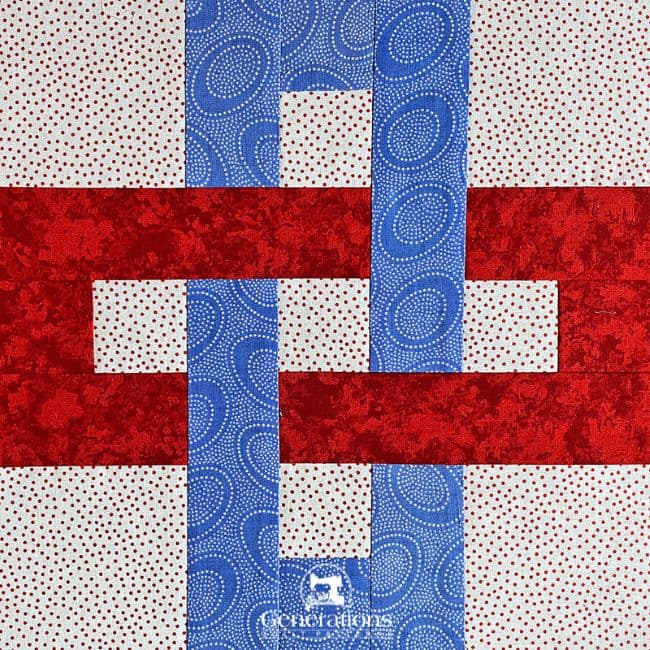
There are pictures to help you every step through the process.
To set these blocks into a quilt there's a suggestion for a sashing design (at the bottom of this page) that completes the illusion of interlocked chain links.
Let's get started!
Use these quick links to easily navigate around this tutorial:
Unchain your quilting muse!
📋 General Instructions
These abbreviations are used in this Chain Link tutorial:
- SA - seam allowances
- RST - right sides together
- Bac - background fabric
1/4" seam allowances (SA) are used throughout.
Pressing instructions are highlighted in yellow to make them easy to find.
When pressing, first press the units flat to meddle the fibers of the thread into the fabric, then a second time as instructed. You'll end up with flatter seams with this two step process.
✂️Cutting patches for a Chain Link block
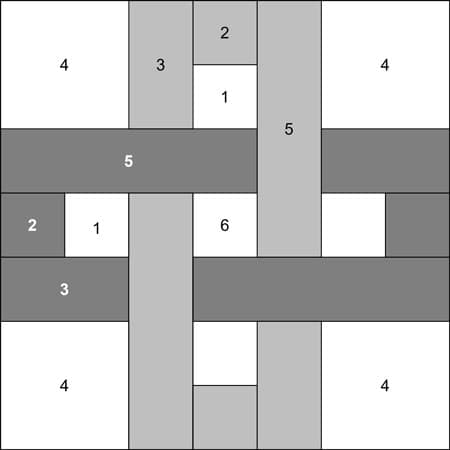 Chain Link design
Sample Size: 10½" finished / 11" unfinished
Grid: 7x7
Design Type: Partial Seams/Puzzle Piecing
It looks complicated in the design drawing (above), though it's really all the same unit, just colored two different ways and then rotated around a center.
The same piecing order is used for all four units.
There are two sets each of two different chain fabric placements—the chain fabrics are A and B.
In the first pair of units, #2 and #3 are one chain fabric; #5 is the other. For the second pair, A and B are reversed in the patches.
This will make more sense as you move through the photos in the tutorial.
To assist you as you construct this block, download and print the cutting chart and block design here.
There's also a coloring/fabric planning page to download, too.
 | Cutting Chart for a~ Traditional Piecing ~ | |||||
|---|---|---|---|---|---|---|
| Patch | Fabric | Qty | Finished Block Size | |||
| 7'' | 10½'' | 14'' | 21 '' | |||
| 1, 6 | Bac | 5 | 1½'' x 1½'' | 2'' x 2'' | 2½'' x 2½'' | 3½'' x 3½'' |
| 2 | A, B | 2 ea | 1½'' x 1½'' | 2'' x 2'' | 2½'' x 2½'' | 3½'' x 3½'' |
| 3 | A, B | 2 ea | 1½'' x 2½'' | 2" x 3½'' | 2½'' x 4½'' | 3½'' x 6½'' |
| 4 | Bac | 4 | 2½'' x 2½'' | 3½'' x 3½'' | 4½'' x 4½'' | 6½'' x 6½'' |
| 5 | A, B | 2 ea | 1½'' x 4½'' | 2'' x 6½'' | 2½'' x 8½'' | 3½'' x 12½'' |
| Unfinished Block Size | 7½'' | 11'' | 14½'' | 21½'' | ||
| Grid Size | 1'' | 1½'' | 2'' | 3'' | ||
🪡Assemble the Chain Link units
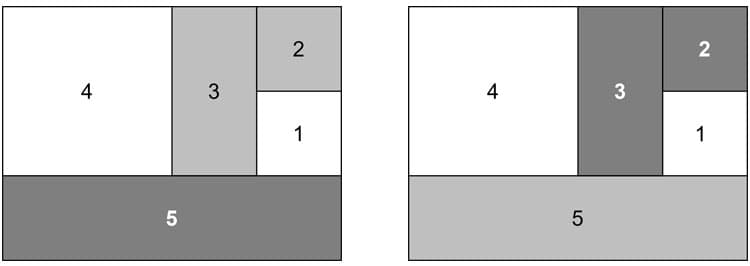 Chain Link units
All the SA in this block are pressed AWAY from the chain link fabrics (A, B) and towards the background. Press after the addition of each patch.
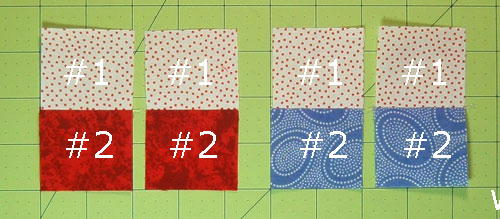
With right sides together (RST) stitch #1 to #2. Two sets use A fabric and two use B.
Press SA toward the #2 patch.
With RST, add the #3 patch.
Press in the direction of the arrows.
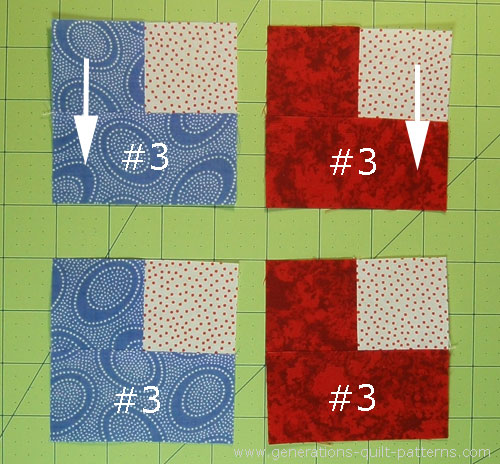
With RST, add #4.
SA are pressed toward #4.
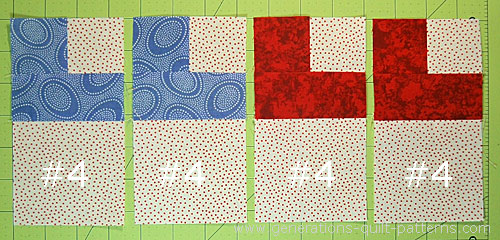
And finally add #5 with RST. The #5 is the color of the other link. Use the photo below as a reference.
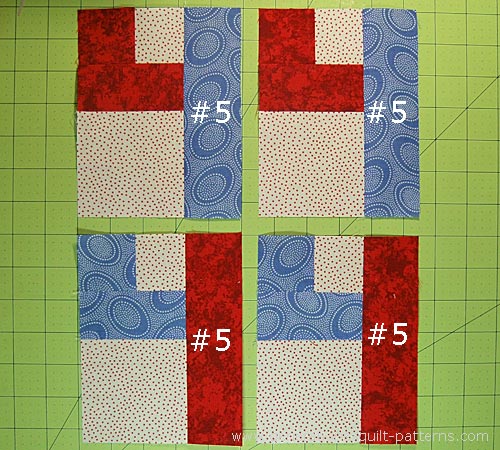
SA are pressed toward #5.
Take a hot minute and check the accuracy of your stitching using the chart below.
Unit Dimensions | |
|---|---|
| Finished Block Size | Edge-to-edge Measurement |
| 7" | 3½" x 4½" |
| 10½" | 5" x 6½" |
| 14" | 6½" x 8½" |
| 21" | 9½" x 12½" |
Make any adjustments before moving on.
Step 3: Assemble your Chain Link quilt block
Arrange the pieced Chain Link units around the center #6 square. As you move clockwise around the block, alternate the #5 A and B fabrics to form the chain link.
For the remaining steps, all the seams are pressed toward the #5 rectangle and away from the center, #6 square.
Press after adding each pieced unit.
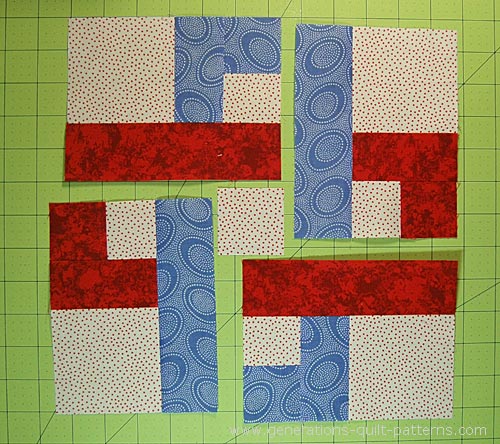
Flip the #6 center square, RST with the Chain Link unit in the upper left corner. Stitch the seam between the #5 (long rectangle patch) and #6 center a little more than halfway as shown below. Stop about where the vertical line is in the photo below.
You can backstitch at the end of the seam or not. (Sometimes I do, sometimes I don't.)
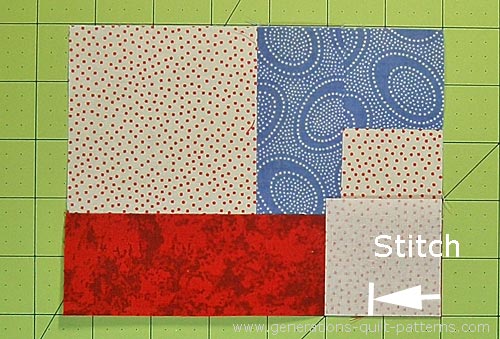
Fingerpress the SA toward the #5 rectangle.
With RST, add the second stitched unit.
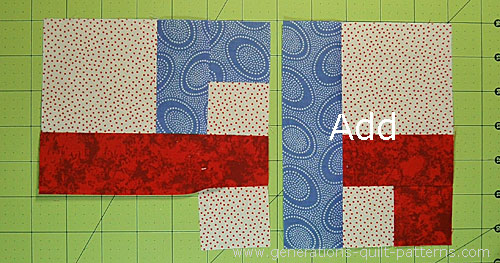 Only about half of the seam connecting the first unit to #6 is stitched.
This is a complete seam. I use pins to keep the edges neatly together. (Glue basting would work here. too.)
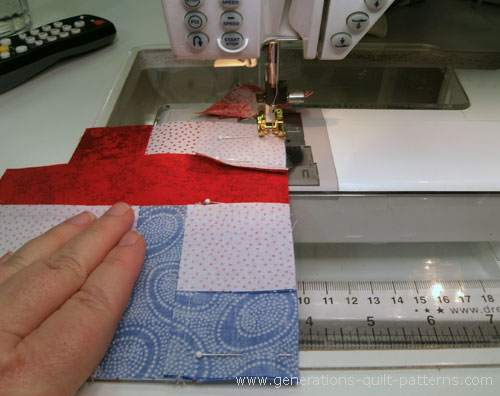 Pinning helps keep the cut edges lined up nicely.
Add the third pieced group of patches, stitching the length of the patches.
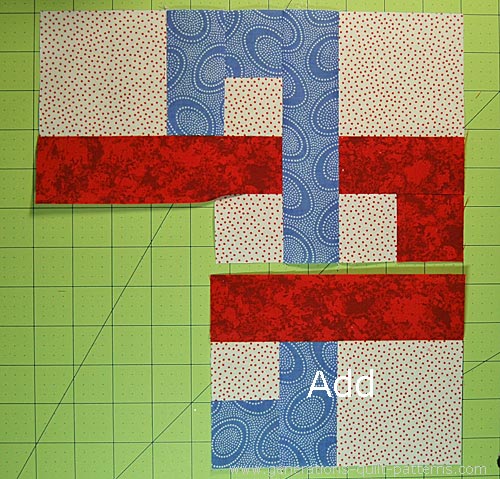
With RST, add the fourth pieced group. Again, this is a complete seam.
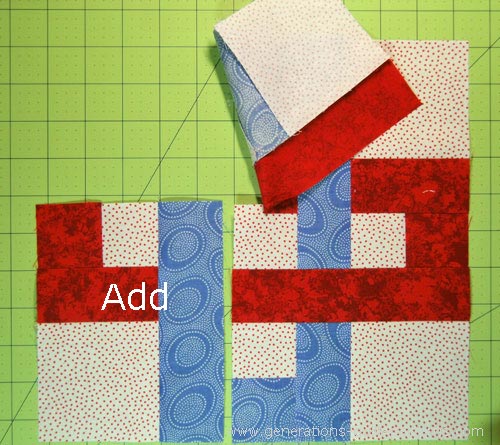
This last seam is a partial one—remember we stitched a bit of it at the beginning of assembling the block. I stitched from the #5 side because it is easier to see the previous stitching.
The pins are used to keep the edges straight AND to hold the SAs on the other side in place so that they don't flip during stitching.
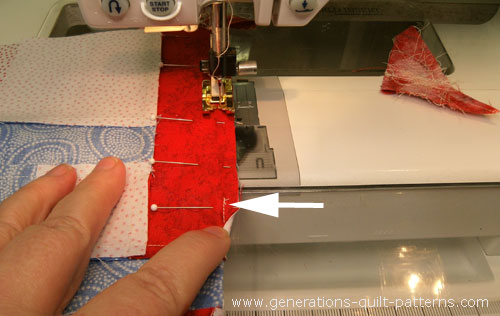 The arrow points to the end of our first partial seam.
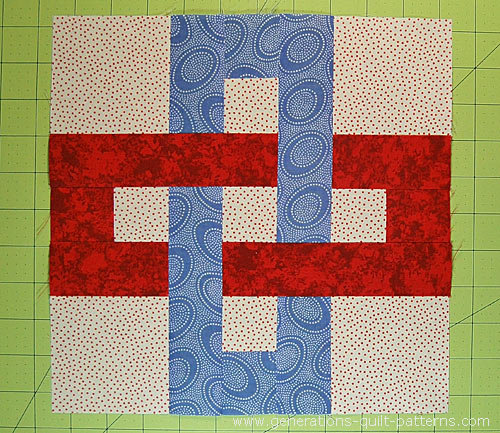
Give your Chain Link quilt block one final press and here it is!
🎨
Using the Chain Link quilt block in a quilt
If you choose to make a quilt out of this block, you might want to consider using a sashing that links the chain, like the one to the below.

Add it into a straight set quilt layout and it looks like this.
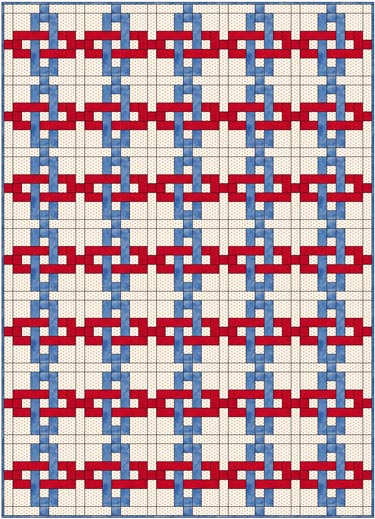 Straight set, 5x7 blocks
Use the chart below to cut fabric for the sashing strips. The amount of sashing you'll need depends on the number of blocks in the quilt and whether or not the it's used in the border (as shown above).
Press the SA toward the center patch so that they nest with the seams in the block.
| CUTTING CHART Sashing for Chain Link Quilt Block | Finished Block Size | |||||
|---|---|---|---|---|---|---|
| Patch # | Fabrics | Qty | 7” | 10½” | 14” | 21" |
| 1 | Background | 2ea | 1½” x 3½” | 2” x 5” | 2½” x 6½” | 3½" x 9½" |
| 2 | A or B | 1 | 1½” x 1½” | 2” x 2” | 2½” x 2½” | 3½" x 3½" |
| Unfinished Sashing Size | 1½” x 7½” | 2” x 11” | 2½” x 14½” | 3½" x 21½" | ||
| Grid Size | 1” | 1½” | 2” | 3" | ||
Now add a bit more drama by setting the blocks in an on-point layout using the same sashing unit.
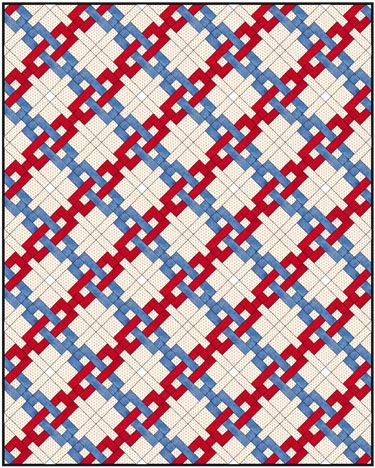 Diagonal or on-point set, 4x5 blocks
A fun little quilt that any beginning quilter (or an experienced one for that matter!) would be proud of.
Stuck in a quilting rut?
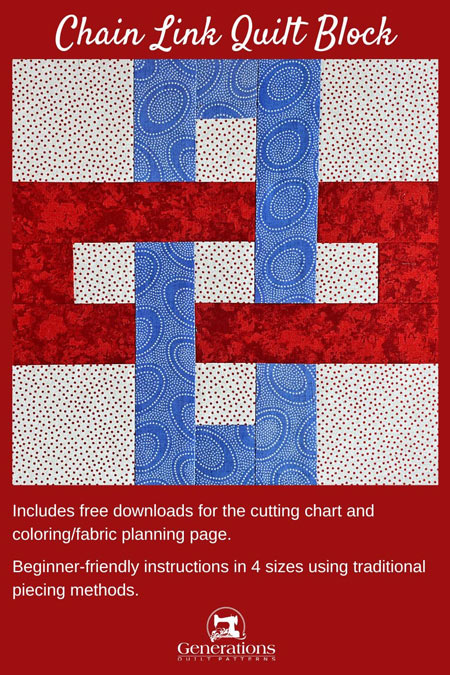
Pin our Chain Link block tutorial and link up with your next obsession!
This deceptively simple design will have you chaining together fabric faster than you can say "quilt."
For even MORE blocks to make… 🧩🎨

...visit our Free Quilt Block Pattern Library, with over 260+ blocks to choose from in multiple sizes.
Free downloads are included in all sizes for any blocks require paper piecing patterns or templates.
- Home
- Free Quilt Block Patterns
- Chain Link Quilt Block


