- Home
- Quilt Design Inspiration
- Valley Square Quilt
Setting Options
for your Valley Square Quilt
From our Quilt Design 101 series...you love the block...now what?
This post contains affiliate links, for which I receive compensation.
After making your Valley Square quilt blocks, it's time to play with layout ideas.
Horizontal rows and columns?
Diagonal sets?
Sashings?
I tried them all. And with pleasing results, if I do say so myself.
On this page you'll find 7 different layout options for your Valley Squares.
Finally there are links to my favorite design tools if you'd like to try your hand at your own patchwork designs.
Let's look at the possibilities!
My Favorite Quilt Design Software
All the free patterns and block/quilt illustrations on this site were created in either EQ7 or EQ8—my favorite quilt design software.
This program makes it so easy to audition different
colors and values with just a few mouse clicks.
Rotate and flip the blocks with another series of clicks.
I can't imagine going back to graph paper and colored pencils.
Or worse yet—simply keeping my fingers crossed. Fabric is much too expensive!
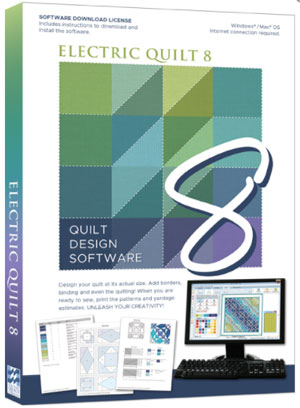
The box contains a software download license—License ID and Password—and a booklet to get you through installation and get you started. There is no disk as in the past.
Download the software onto your computer from the EQ website using the ID and password as directed. At the time of download you can choose either PC or MAC.
I LOVE Electric Quilt!
I hope you do to.
Not familiar with a Valley Square?
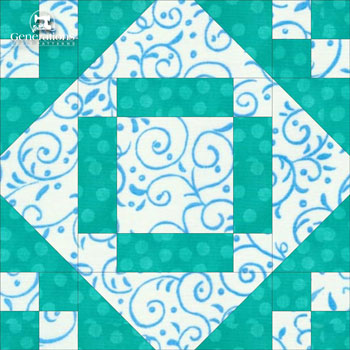 Valley Square design
Don't fret.
Just click here to go to the tutorial and make one for yourself.
Straight Sets for our Valley Square Quilt
The easiest patchwork patterns to stitch are those laid out in straight sets.
There's no setting triangles—either pieced or solid—which means there's no bias edges for you to have to mess with.
Each of the patchwork designs you find in this section are 6 blocks across and 7 down (unless otherwise noted) for a total of 42 blocks each quilt.
Finished quilt sizes without sashing for each block size are:
- 9" - 54½" x 63½"
- 13½" - 81½" x 95"
- 18" - 108½" x 126½"
Because the design is completely symmetrical, you can use even or odd numbers of blocks in the rows and columns—with no effect on the symmetry of the final pattern.
This first, very basic pattern the blocks set edge-to-edge. No sashing.
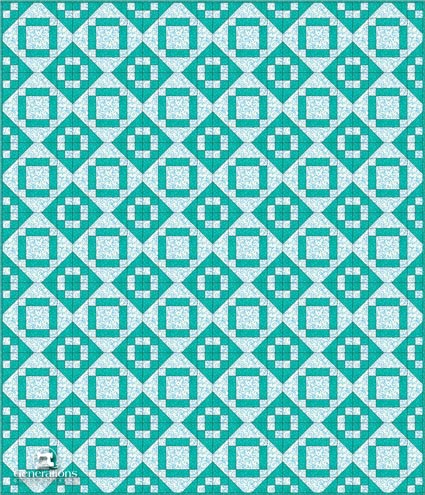 Valley Square, straight sets
If you recall from the Valley Square tutorial, instructions are given to 'twirl' the seam allowances of your four patches. [Click here for a quick refresher.]
Seam allowances joining the rows together are pressed out from the center.
In doing so, you create blocks that are easy to set together in this edge-to-edge layout. If the seams don't nest, simply rotate one block a quarter turn.
Some quilters scoff at making sample blocks. I beg to disagree and encourage you to make samples.
Creating a sample block to test all the instructions is the best way to figure out pressing directions—especially when so many patterns these days don't include them.
Ideally, your block stitches out perfectly. You'll be able to use it in your top. Otherwise, you can always use it on the back.
Nothing has to go to waste in quilting!
Halfway through?
Just want to throw in the towel?
Try setting with an alternate solid square like this.
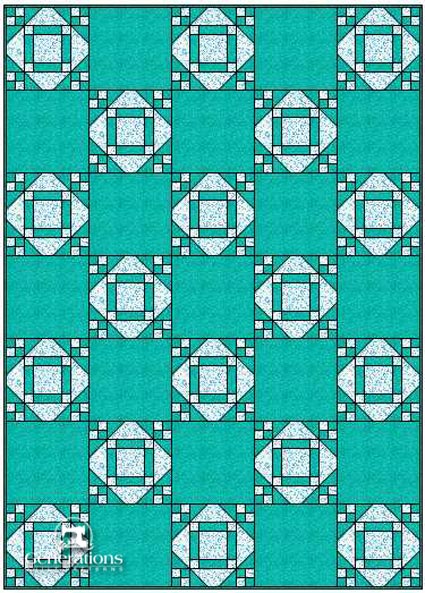 Use odd numbers in the rows and columns to balance this pattern. Here we've used 7 rows of 5.
This design symmetrical—the same block in all four corners—because it's made with odd numbers in the rows and columns.
In this next horizontal layout, a simple sashing (blue print) and cornerstone (teal) are added.
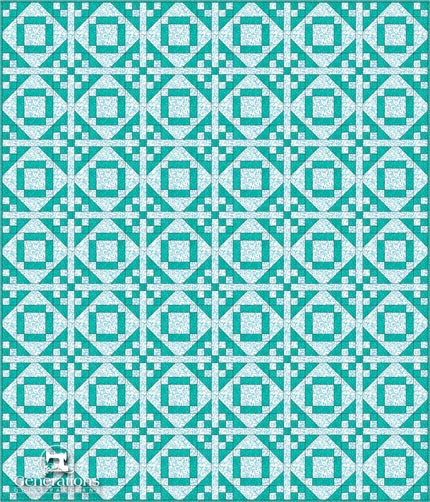 Valley Square, straight sets with sashing
This quilt's a bit more visually interesting.
Even with the sashing to mark the edges of the blocks, the design lines are getting harder to find.
In this next variation, the sashing is now pieced. Nothing difficult. It can be created with strip piecing techniques so it's fast, too!
 Valley Square with pieced sashings
The pieced sashing makes it even harder to find the actual block, doesn't it?!!
Are you seeing a bit of a curve in the lines? It's all an illusion.
Don't you just love when a design does that?
On-point settings for our Valley Square
An on-point layout ups the difficulty just a bit. Your setting triangles can now be either pieced or solid fabric triangles.
In these examples, pieced setting triangles are used to complete the patchwork design.
Again, because the blocks are completely symmetrical, you can have either odd or even numbers in the rows and columns with no effect on the symmetry of the completed design.
The quilts in this section are 4 across by 5 down. Each contains the following numbers of blocks:
- 32 complete
- 14 half (for filling in the top, bottom and sides)
- 4 quarter (corners)
This first diagonal set shows an edge-to-edge layout.
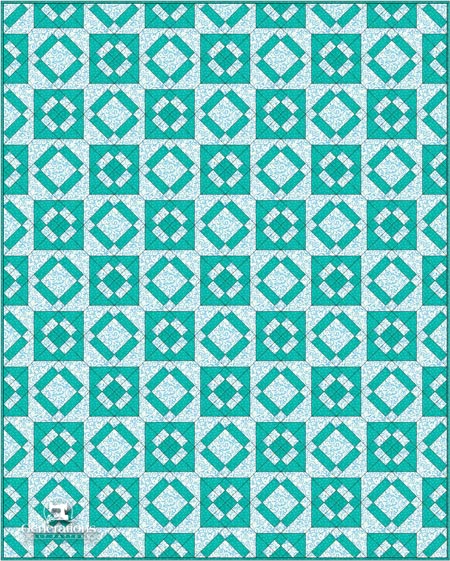 Valley Square quilt, on-point layout
Nice, but nothing spectacular for the extra work. Right?
Now add in the solid sashing and cornerstones.
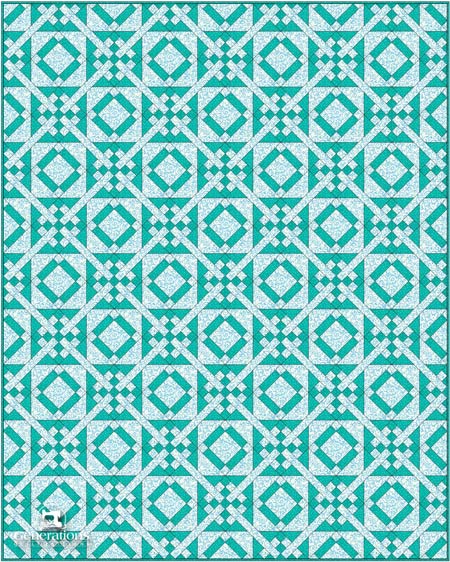 Diagonal layout with sashing
Hmmm.
That's more interesting. The design lines are beginning to blur.
Finally, use the pieced sash...
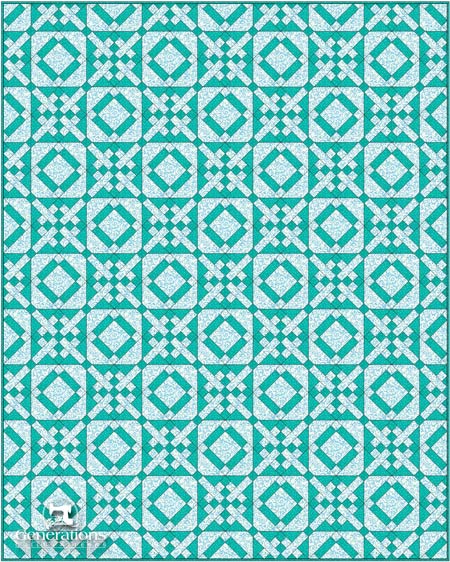 Diagonal setting with pieced sashings
Is it just me, or do the lines appear to curve more than just a bit?
Sashing and Cornerstone Cutting Charts
The Valley Square block tutorial gives directions to make 9", 13½" and 18" finished blocks.
To add the sashing and cornerstones you'll need additional patches. The number of patches you cut depends on the number of blocks you use in your quilt.
These are the cutting charts for those alternatives.
 | Cutting Chart | ||||
|---|---|---|---|---|---|
| Patch | Fabric | Qty | Finished Block Size | ||
| 9" | 13½" | 18" | |||
| Cornerstone | D | 1 | 1½" x 1½" | 2" x 2" | 2½" x 2½" |
| Sashing | L | 1 | 1½" x 9½" | 2" x 14" | 2½" x 18½" |
| Unfinished Block Size | 9½" | 14" | 18½" | ||
| Grid Size | 1" | 1½" | 2" | ||
To make this pieced sashing instead, use the yellow cutting chart.

 | Cutting Chart | ||||
|---|---|---|---|---|---|
| Patch | Fabric | Qty | Finished Block Size | ||
| 9" | 13½" | 18" | |||
| Cornerstone | D | 1 | 1½" x 1½" | 2" x 2" | 2½" x 2½" |
| Sashing-1 | L | 2 | 1½" x 4½" | 2" x 6½" | 2½" x 8½" |
| Sashing-2 | D | 1 | 1½" 1½" | 2" x 2" | 2½" x 2½" |
| Unfinished Block Size | 9½" | 14" | 18½" | ||
| Grid Size | 1" | 1½" | 2" | ||
