This post contains affiliate links for which I receive compensation
My rotary cutter chops my fabric like a lawnmower
by Wandie
Wandie writes...
Lately when I use my rotary cutter the cut does not come out smooth and straight.The strip is not uneven but the edges look like they have been chopped with a lawnmower!
What am I doing??
Julie replies...
Hi Wandie!Great question with simple answers. (I hope!)
Eventually a blade gets dull
When it does, a couple things happen.First, you end up having to push harder to force it through the fabric layers. That's just wasteful—a lot of extra effort for the same result. And if there's mountains of patches to cut, way too much wear and tear on your joints. For just a cut or two, it doesn't mean much. But add it up over 100's of cuts and suddenly your arm and hand are sore.
Second, in using more force, we sacrifice a bit of accuracy. So a dull blade may be at the root of your problem.
It's funny how we quilters can be so resistant to installing a new blade. It only takes a minute.
Remedy for 'New Blade Aversion' Syndrome
One of the things I do to cure 'new blade aversion syndrome' is to buy my rotary cutter blades when they're cheap, usually waiting for the big sale on the Joann's notion wall.During a 40% off sale, the 5-pack (and I always buy blades in multi-packs) goes for about $22.19 (40% off of $36.99). The 10 pack is $35.99 (40% off of $59.99). So a single blade at those prices goes for $4.44 to $3.60 instead of $6.59 (40% off of $10.99 single blade pack).
Quite a savings that makes it much easier to replace that dastardly dull or nicked blade as soon as it quits working properly.
Installing a new blade for the best efficiency
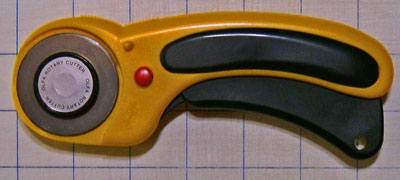
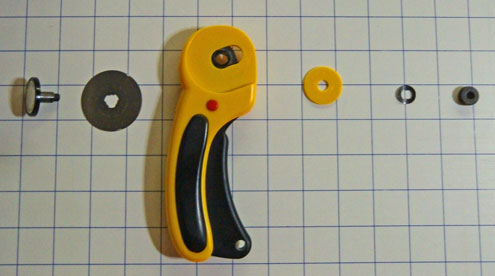
Once you've accepted the need for a new blade, there's a trick to replacing it.We all know to remove the parts and lay them out in order to make reassembly methodically easy.
Here's the 'secret sauce' to reassembly...
I learned this trick from Karen Musgrave, whose name you might recognize from her work with the Alliance for American Quilts. In particular her dedicated work on the Quilter's SOS - Save Our Stories interviews.
After removing the old and mounting the new blade with everything screwed back on, hold the rotary cutter handle between your thumb and forefinger—like you're politely holding a teacup. Now try to roll it along the cutting mat.
The blade should roll easily with practically no effort. If it doesn't, loosen the screw a tiny bit and try again. That screw needs to be only as tight as needed to hold the blade stable and in place. Anything more inevitably leads to excess wear and tear on your joints because you have to push harder to cut your through your fabrics.
A second possibility for your problem...
Double check that you didn't accidentally install TWO blades.Ask me how I know...{hangs head in shame}!
New rotary blades come packed with an oily substance already on them. I don't know if it's to lubricate them or prevent rusting. That doesn't really matter though.
Usually you can get a hold of just one to swap-in for the dull blade.
Once in awhile though, two of those razor-sharp critters just refuse to let each other go. Voila! You've unintentionally mounted TWO new blades on the handle. This definitely leads to raggedly cuts along a straight edge.
I've done this once and it took me the LONGEST time to figure out what the problem was.
Hopefully, one of these two fixes works for you.
Readers, I'm always looking for more information. Have you had this problem? What did you do to fix it? Please share your experience using the 'Comments' link found just below.
Thank you!
Piecefully,
Julie Baird
Editor


Nifty Notions


By Julie Baird
Copyright © 2008-2026 Generation Quilt Patterns, LLC
All Rights Reserved
Generations-quilt-patterns.com does not sell any personal information. (See Privacy Policy)