This post contains affiliate links for which I receive compensation
Finishing an embroidered quilt wall hanging
by Marilyn
(Ohio)
Marilyn asks...
I have a 36" square embroidered quilt top, all one piece of cotton fabric.I didn't want to quilt over the embroidery, as I thought it would detract from the stitching.
Do I need to worry about possible stretching?
Julie replies...
Hi Marilyn!Without seeing the actual quilt I have to respond with general statements.
On the face of it, I agree with you that I would prefer NOT to stitch over the embroidery in any noticeable way because it is the 'star' of the quilt.
I am assuming that the design is symmetrical and that you've hooped and rehooped to complete the stitching. There are a couple ways to go about quilting it.
Grid quilt...
If there is enough open space, simply mark and quilt diagonal cross-hatching in the background—stopping and starting at the edges of the embroidery stitches. There'll be lots of tying off or microstitching, but especially if the embroidered design is round and curvy, the straight lines of the grid will emphasize the beauty of the embroideries.To be truthful, if it was my quilt I would outline quilt thisclosetotheembroiderystitces at least the larger elements first. This would help stabilize the quilt sandwich, much like you would for a hand applique quilt.
My preference would be a monofilament thread, but some testing on a practice stitch out would reveal whether a thread that matches your background fabric in either color or value would work, too.
...or just outline quilt...
...if there is little open background space for stitching.Again, if it's symmetrical it helps. Choose one shape to outline in the 'ditch' and then repeat for each of the same element. Keep adding this type of quilting (as regularly spaced as possible) until there is enough quilting to hold all the layers together.
Basting is a crucial part of this project.
Usually I recommend that when you place your palm on the pin basted sandwich that you be able to feel at least one pin. I suggest here that you use more so that any stretch or 'poof' that occurs during quilting is contained in one area. Depending on how dense the embroidered design is, this quilt may be a candidate for spray basting.
Click here to learn how to spray baste.
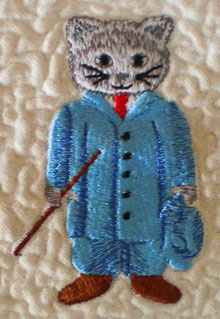
In the little kitty embroidery to the right, the embroidered stitching is quite dense. I stitched in the ditch right next to the embroidery stitches and then stippled the background.
Even with Quilter's Dream Request (a thin cotton batt) the kitty is a bit poofy, like a little pillow. It's only about 3" high by 2" wide so I didn't go back to add any extra stitching.
If you get too much poof you might want to add some stitches over the top of the embroidery. Matching thread and testing beforehand on a sample stitch-out is extremely important so that you can identify and solve any problems before you get to your real masterpiece.
Readers, your suggestions and experiences are welcome here. Please use the 'comments' link below to share your knowledge. Thank you!
Marilyn, hopefully this has given you some helpful tips. And as long as the quilting is even across the quilt, I don't believe you'll have to worry about stretching.
I'd love to see the quilt when it's finished. Please share a picture of it with us!
Piecefully,
Julie Baird
Editor


Nifty Notions


By Julie Baird
Copyright © 2008-2026 Generation Quilt Patterns, LLC
All Rights Reserved
Generations-quilt-patterns.com does not sell any personal information. (See Privacy Policy)