- Home
- Machine Applique (Invisible)
- Applique Techniques
Applique Techniques
for Positioning Templates
Lesson 3: Positioning templates
This post contains affiliate links, for which I receive compensation.
No matter which applique techniques you use to prepare your templates, try this method to position applique shapes.
You'll be spot on every time!
Add a smidge and cut your background squares
One of the most common applique techniques used is to cut your background square 1 to 3 inches larger than the unfinished applique block.
EXAMPLE:
The calculations for how large to cut the background fabric for a finished 15" applique block are:
15" square finished size + 1/2" for seam allowances + 1" to 3" extra
equals
Cut a 16-1/2" to 18-1/2" background square
How much is enough?
For our small basket block example, a 6" background square is big enough for a 5" finished block.
The blocks need little handling and are quick to stitch with little distortion.
For larger blocks, you'll want more insurance because:
- The more you handle the applique block, the more your edges fray.
- The more stitching, the more the background will distort.
- There's bigger chance you won't center it exactly on the background fabric. You'll need extra to square up the block.
- If you wash your applique blocks individually after stitching, the background can shrink more than you expect.
With this extra insurance, you'll be able to easily square up your applique blocks when the stitching is complete.
Rulers to help square up your blocks
It seems like there's always a specialized ruler for doing things in quilting, and squaring up your blocks is no different.
Find the center and create your registrations lines
To find the center of your background fabric block match the top edge to the bottom and lightly press a crease. Open the block.
Next fold the left edge to the right edge. Again, lightly press a crease.
The intersection of these two lines is the block center. The lines, themselves, will be used as registration lines for placement.
Our basket block is small enough that finding center wasn't needed.
However, for a larger block that may take a while to stitch, you may wish to run a line of basting (in a color close to the background) along both creases.
Create units before stitching
Our simple "Trick or Treat" basket has two pieces...a basket and a handle. Let's make them into a single unit.
Create the placement guide
Our placement guide serves two purposes:
- As a guide for assembling our units into uniform baskets
- As a placement guide for the baskets onto our background squares
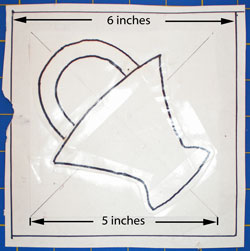
It'd be an easy eyeball placement. But there's very little background fabric around the basket so I choose to make a placement guide.
The pattern in the book provided a drawing of the basket, but not a drawing of the basket centered in a block so I drew my own.
Here, I've centered and traced the basket pattern onto a 5" square of paper.
Next I drew a 6" square (the size background fabric is cut) and centered and taped the 5" square to it.
Seems like a bit of extra work, right?
Yep. You're right. It'd have been faster to:
- Draw a 6" square (the size of the oversized fabric squares I cut), then
- Draw a diagonal line from both pairs of opposite corners to quickly find the center.
- Find the center of the basket pattern and mark it on the pattern
- Match the two centers and trace.
But sometimes this ol'brain is not caffeinated enough. It happens. ;)
NOTE #1: If I was working on an asymmetrical design (one where the left and right sides didn't match) I would have traced a reverse image of the pattern.
NOTE #2: The 'shininess' you see in the photo to the right is the tape I used to stick the basket drawing to the square guide.
Glue the basket unit
In this applique technique, we use both Elmer's Washable Glue Stick (goes on purple) and Elmer's School Glue. Both will be completely washed out in a later step.
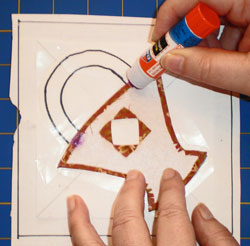
Place the basket (Rinsaway template up) on the placement guide in its position.
Add a dab of Elmer's Glue Stick to the basket where the basket handles meet the top edge.
While it'd be nice if all of our prepared shapes exactly fit in the the lines, they often don't. This is normal. It doesn't mean we did a bad job...it just means we did it by hand. :)
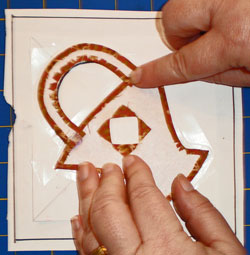
Now place the basket handle (Rinsaway template up) in its place. Smooth the handles to bond both pieces.
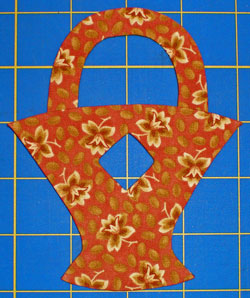
At your ironing board, press with an iron to dry.
Remember to protect both your iron and ironing surface with fabric scraps or an applique press sheet of some sort.
This is our completed basket unit.
Applique techniques and the 'Light Box'
Several applique techniques have you mark the design on the background with a blue washout marker or a pencil.
But applique projects can take a long time to stitch.
The longer a marking is left on your fabric, the more opportunities you have to accidentally set the mark making it hard to remove. (Remember, the blue washout markers are made permanent with heat.)
So I use a light box. It's easy to use.
Now the 'big-box' stores all carry light boxes. For their $80-90 price tag, they're much too expensive and cheaply constructed for my taste.
There is a newer one on the market now. It's slim, uses LED lights and comes in several sizes.
Click here to learn more about LED lightboxes and light pads at Amazon.com.
The gigantic one is on my wish list for sometime when I've got the extra cash burning a hole in my wallet, but for now...
There are cheap light box alternatives
My solution is to use the same kind of box I use to store my fabric
stash.
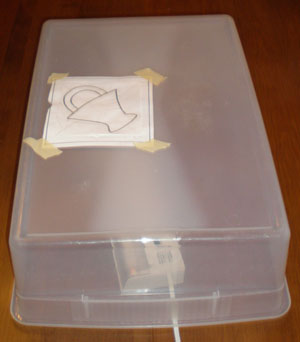 A lil'bit of ingenuity gets the job done!
The Sterilite boxes (unlike Rubbermaid) do not have humpy-bumps on the bottom. Any small bump in the center can be sanded if it is a problem.
Place an inexpensive fluorescent light stick under the box, and...
Voila!
Instant, large, light box for under $20.
If you don't have one of these light sticks handy, try using a strand of the LED (low heat) Christmas lights instead.
Other alternatives options are:
- Tape your pattern to a sliding glass door window.
- Put a light under a glass top table.
- Put a light under an old window.
Now back to the tutorial...
Glue the Basket Unit to the Background Square
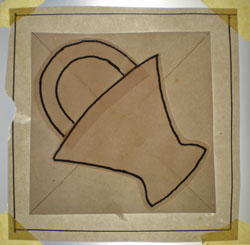
Tape the placement guide to the light box so it doesn't move.
Er, looks like someone ripped the paper on the left side with a bit too much gusto.
Wonder who that could've been? :)
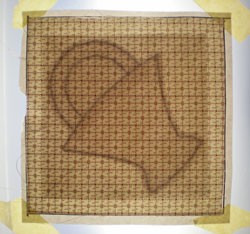
Place the background square on the guide.
If you are working on a bigger block with more pieces, tape the background to the light box for more control.
Turn on the light to see your pattern through the background.
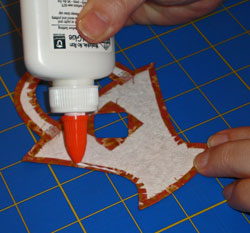
Draw a fine line of Elmer's White School Glue around the outside stitching edge and the cutout square. It doesn't take much but it should be a continuous line.
Stores like Joann's and Michael's sell metal tips that can be screwed onto the glue bottle to create an even finer line of glue.
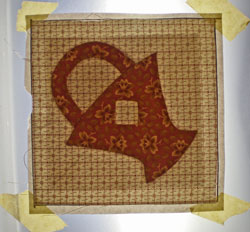
Place the basket/handle unit onto the background and smooth into place.
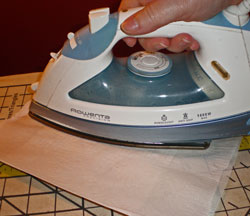
Back to the ironing board. Press with a hot iron to dry the glue.
Remember to protect both iron and ironing surface.
Parchment paper is used in the picture.
I use Kirkland's Signature Non Stick Parchment Paper. I get mine at my local Costco.
Lo! And Behold! Amazon carries it, too!
Once it is dry, this fine glue line is strong enough to hold the piece in place while you stitch AND it stabilizes your stitching line AND NO PINS to work around.
And now the basket applique block is ready...
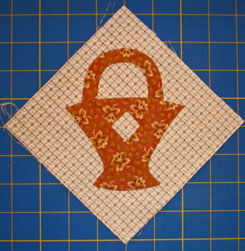
When you're finished with these applique techniques, you're ready to set up your sewing machine for stitching invisible machine applique.


