- Home
- Beginner Quilt Blocks
- Half Square Triangle Units
Half Square Triangle Units
Just like strolling around the block...Technique #3
This post contains affiliate links, for which I receive compensation.
Making half square triangle units just doesn't get any easier than this!
Two squares.
Four lines of stitching.
Two cuts.
And you've got four HST units ready to go into your blocks.
Pros:
- Wickedly fast and easy!
- Perfect for use with precuts—charm squares, layer cakes
- No need to mark your stitching line with a pencil (one less step!)
Cons:
- Not quite as scrap-friendly because the starting squares are larger
- The outside edges of the finished units are on the bias—I suggest you use starch to tame them
- Not all precuts are cut as exact as you would cut them yourself, you'll have to watch.
- The math is wonky—so I've provided a free downloadable cutting chart below.
For my personal opinion on this technique, please read my note below.
Now let's see how it's done!
The Technique
Print our free cutting chart for these units. There you'll find the size to cut your squares. (You'll find it in the 'Downloadable Chart' section.)
Step 1
Layer two contrasting squares, right sides together. Align all the edges.
Pin, if necessary to hold them in place.
The square below measures 4-3/4" and I did use pins...that's my nature!
Sew around the entire square, 1/4" away from the edge. You can stitch continuously, pivoting at the corners, or stitch each side separately--easier to chain piece if you've got loads of HST to stitch.
Helpful Hint:
Try pressing the patches together as they are layered to hold them together instead of pins. Cotton fibers WANT to stick to each other.
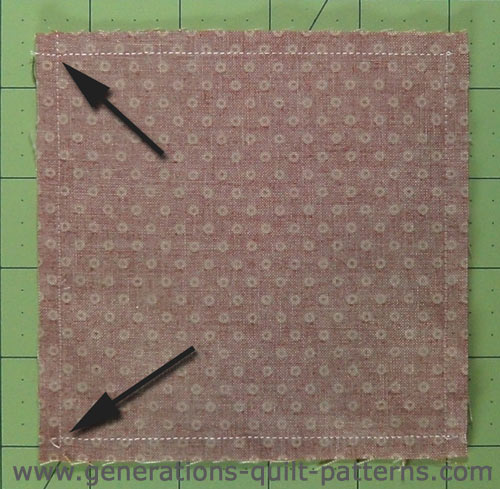 Stitch all four sides with a 1/4" seam allowance
Step 2
Cut the sewn unit, once on the diagonal from corner to corner.
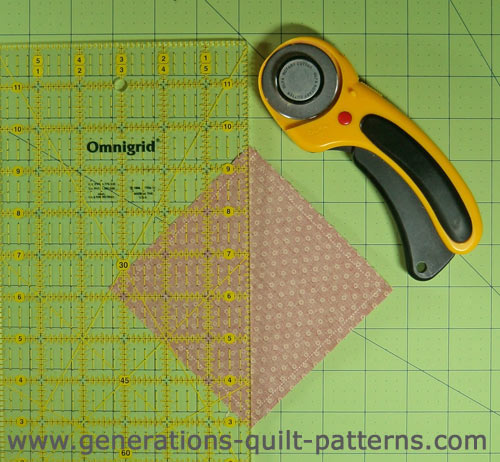 Cut from corner to corner along both diagonals
This is one of those times that it's helpful to have a small cutting mat—like the 12"x18"(link opens in a new window)—because then you just turn the mat to make the second cut. You don't disturb the patches.
Now cut on the remaining diagonal. You now have four HST units.
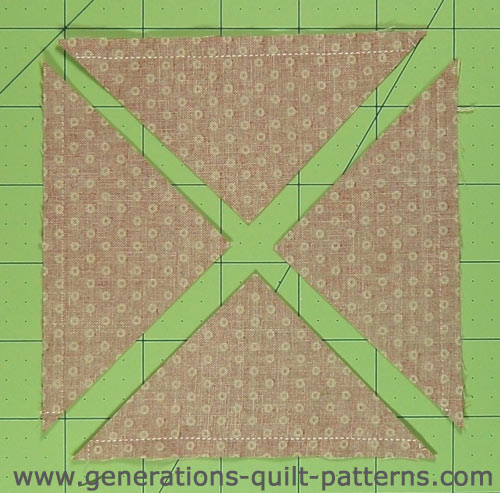 Four HST units ready to be pressed
Step 3
Press the unit in the unopened position to set the seams.
And now press it open.
REMEMBER: ALL the outside edges are on the bias.
You can press the seam towards the dark fabric (traditional), towards the light (perhaps to reduce bulk), or open (to reduce bulk and/or prevent shadowing if your fabrics are high contrast).
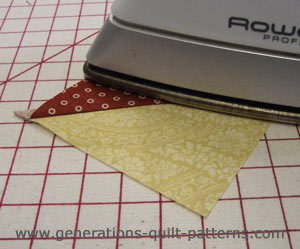 Now press the seam open
Helpful Hint:
If you find that your bias edges are too stretchy for your taste, try starching your quilt fabric before you cut your squares. The starch helps to tame the edges and makes pressing a dream.
The only drawback is that the starch must be washed out when your project is complete.
Step 4
Trim off the dog ears...they have not been trimmed in the picture below...
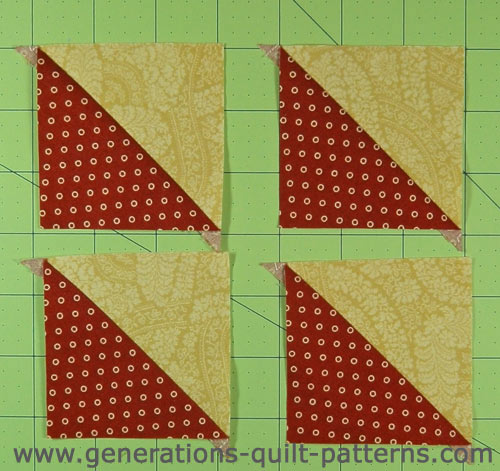 All that's left to do is trim the dog ears!
That's all there is to making four half square triangle units at once!
If it sounds like a good technique for you, then do print our free...
Downloadable Cutting Chart
The math for calculating what size squares to cut is a bit wonky. [Click here to see what it looks like...]
If you're math-adverse that might have made you throw up in your mouth a little bit. That's OK...you're a QUILTER first! Nothing to apologize for.
But me, I've got a bit of math geek in me...I really do LIKE to figure this stuff out.
So, to make things easier for you, click on our 'Stamp our Math' button to the right to download your free chart with many sizes of finished half square triangle units (the page opens in a new window).
Because I personally like to trim my final units to size (and thus ensure perfect little units that make my blocks practically stitch themselves together) the chart also includes cutting dimensions calculated with some 'fudge factor' built in.
Easy peasy!
If you would prefer a chart that starts with the Cut Square size and then computes what the resulting Finished/Unfinished HST size is, click here.
Personally, I'd print both charts.
A note from Julie:
I wish I could give this quick technique a whole-hearted two-thumbs up...but I can't.
If you are using the resulting triangles in a traditional quilt, you need to trim virtually every triangle to your needed size. There's just no good math. Even after the HST are trimmed to perfection, these units are still all bias edges—edges that can stretch if handled too much.
Frankly, if I'm going to go to the trouble to trimming to perfection, I want those edges on straight of grain. There's many other ways to make HST (see the menu below this red box).
But since I shared this technique for making half square triangle units, I must think there was some value to it, right?
Absolutely!
If I was making a quilt from pre-cuts—say 10" layer cakes or 5" charm packs—and the pattern was nothing but HST, then this technique would be perfect. The only thing to double check is that the pre-cuts are actually cut all the same size.
The resulting HST will all be the same size. Since they are the only unit in the quilt, it'll go together nicely. (Starching your fabric to tame the bias will help.)
That would be a perfect use for this method!
- Home
- Beginner Quilt Blocks
- Half Square Triangle Units


