The Curse of Bleeding Fabric
Stop It Before it Starts
This post contains affiliate links, for which I receive compensation.
These instructions will help you root out those bleeding fabrics BEFORE they are ever sewn into a quilt.
It is easy to do, requires no special equipment and takes very little time.
You can pretreat suspicious fabrics before you even cut them to avoid the problem.
The same steps may work if you've found a bleeder in your finished patchwork.
If you're determined to use a fabric that bleeds in your quilt, there are suggestions at the end of this page.
What is "bleeding fabric"?
Commercial fabrics are colored with dyes.
Some dyes lose color when washed. Some of this color transfers to adjacent fabrics and leaves a stain. This staining is called "bleeding".
Water temperature plays a large part in whether or not a fabric will bleed.
Fiber experts recommend that cotton be washed in cold water—that is water that is between 80 and 85 degrees Fahrenheit.
What is crocking?
When fabric dye is transferred from one fabric to another as they rub together. This can happen when the fabric is either wet or dry.
I had a very unfortunate experience with crocking when I was working on 'The Birthday Quilt'.
 The Birthday Quilt, pieced and quilted by Julie Baird
While the backing fabric was prewashed, dried and ironed, it started crocking—leaving behind color on the bed of my sewing machine as I quilted it.
Now it's a maroon-y colored backing fabric. Very dark...
...and I have to admit, after it crocked, with all that white/cream on the front I am afraid to wash it. Reds are notorious.
Since that time, if I find a bleeding fabric, it gets tossed. I just won't take the chance.
The Simple Test
Gather the following simple supplies for this bleed test.
- A square of each fabric to be tested - 3"-ish is fine
- Squares of white fabric - again 3"ish is fine
- A container filled with a cup of cool water between 80 and 85 degrees Fahrenheit
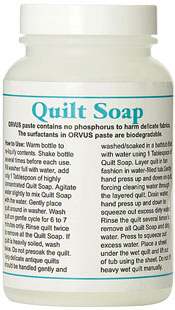
- Soap like Orvus or Ivory or what you expect to wash your quilts in later
The test is quite simply soaking swatches of fabric to see what happens. It looks like a lot of steps, but takes very little time to do other than waiting.
To begin:
- Add one teaspoon of soap to the container. Stir to distribute the soap. (If you're using Orvus or Quilt Soap, use a scant 1/8 teaspoon as it is quite concentrated.
- Add one 3” test square to the container.
- Stir often the first few minutes.
- Let the container sit for 30 minutes.
- Check for any color in the water.
- Remove the soapy water and replace with fresh. Again check for color in the water.
- If there IS NO color in the water, there is no bleeding. The fabric is safe to use.
- If there IS color in the water, remove the fabric from the jar and place in on a white square of cotton fabric. Let the two dry together, touching each other. If no color leaches from the suspect fabric, it will probably be safe to use in your quilt.
- If color has transferred to the white cotton AND you're so inclined, try the test with a new fabric square and a different soap. If this time, the fabric does not bleed you will have to make note of that soap you'll use to wash the finished quilt.
- Any fabric that continues to bleed should be removed from your stash NOW to prevent future accidents.
This test, while it does take a few extra minutes, can save you the heartache of a finding out after your quilt is finished that there's a bleeding fabric in it.
To read about what actually happens when you don't pretest your fabrics, read The Sad Little Penguin Quilt.
Pretreating
...to avoid a problem
You've either tested and know you have a bleeder or you've got a fully-saturated hue that gives you the hee-bee-jee-bies.
You have a couple of options to pretreat your fabric before its first wash.
Retayne
Retayne is a color fixative intended specifically for commercially dyed fabrics—the stuff you get at the quilt store and the big box stores.

The manufacturer's instructions are pretty specific.
- You MUST agitate the treated fabric in your washing machine or by hand for 20 minutes with hot, hot, hot (140 degrees F., 60 degrees C) water. Rinse in cool. Dry immediately.
- To get truly hot water in your washing machine, set your controls to a 'HOT' wash. Go the extra step of turning off the cold water at the wall. That's the only way to ensure that no cold water is added.
- It is best to treat your fabric BEFORE it is used in a quilt.
- After treating with Retayne wash the finished project in only cool water. No hot.
Honestly, my machine doesn't have a 20 minute cycle. If your machine is like mine, you'll need to babysit the machine and restart it without draining off the Retayne-treated wash water.
Or you could do it by hand.
If you click the image of the bottle you can read the reviews on Amazon. Some report terrific results. Some report failure.
Rit® also has a dye fixative; however, my understanding is intended for fabrics you have dyed with Rit products.
What about Synthrapol?
I see a lot of confusion about Synthropol on the Internet.

Synthrapol is a surfactant used in the hand dyeing process (with MX dyes—I know, because I dye fabric for my quilts) to:
- A surfactant helps keep the unattached dye molecules suspended in the wash water instead of settling back on the fabric during washout. Blue Dawn is also a surfactant and will do the same thing.
- Facilitate even dye penetration
- Scour greige goods (plain ol' white fabric) to prepare them for hand dyeing
While this sounds like a good thing, it is intended (as stated by the manufacturer who also makes Retayne) for hand dyed fabrics.
Hand dyeing is a completely different process than commercial dyeing. I would not bother wasting Synthrapol on bleeding fabric—unless it was hand dyed.
The final option...
...just wash it into submission!
Simply wash and wash and wash the fabric until it doesn't bleed anymore.
If I was the least bit suspicious a fabric was a bleeder, it'd never make it into a quilt.
There's just too much work and money that goes into a quilt to take the chance on a bleeding fabric.
The benefit of all this washing is if the fabric fades too much or becomes hard to work with, you'll know before you cut it.
What if the fabric is already in a quilt
...and has bleed into other parts of my patchwork?
It's a gut wrenching moment when you realize this has happened—and its happened to me three times.
To salvage your quilt and either reduce the staining or remove it completely:
- Don't apply heat to the quilt. No dryer. No hot water. As you well know, hot sets stains. It's no different just because it's quilt fabric. No heat until the stain is gone. It's also my experience that some fabrics that bleed, don't bleed in cooler water temperatures. That is certainly true for hand dyed fabrics.
- Don't let the quilt sit in a wet state. If there's any crocking going on, wet touching wet is just another problem waiting to happen.
- DO use Color Catchers. In abundance. Wash is cold water. Continue until you are satisfied. Color catchers are no guarantee, but I don't wash my quilts without them.


Nifty Notions


By Julie Baird
Copyright © 2008-2026 Generation Quilt Patterns, LLC
All Rights Reserved
Generations-quilt-patterns.com does not sell any personal information. (See Privacy Policy)