- Home
- Machine Applique (Invisible)
- Applique Templates
Preparing Applique Templates
Lesson 1 for Invisible Machine Applique
This post contains affiliate links, for which I receive compensation.
Trace, Cut, Glue
Applique templates that are flat with smoothly turned edges are essential to truly invisible machine applique.
Use these techniques to create your finished applique shapes.
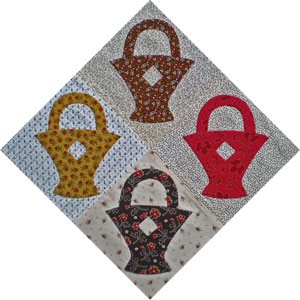
We are using "Trick or Treat Baskets" pattern from the book "When the Cold Wind Blows" (pages 72-75) for this example of invisible machine applique.
The picture shows a group of four of the baskets stitched with this method.
Create Rinsaway Applique Templates
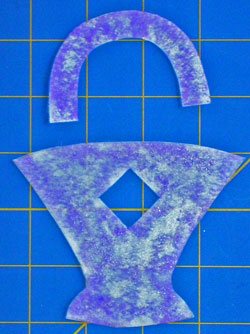
 Cut Rinsaway into a manageable sizes. Trace your applique pattern pieces onto it. With just two pattern pieces there's no need to mark pattern numbers.
Trace the shapes onto Rinsaway (a water soluble stabilizer) with a pencil using a light touch.
If the template is reversible, there is no need to mark the back side of the template. If it is not, lightly mark the side of the template that touches the background fabric (the back side) with the number of the piece.
Identify edges that won't be turned under.
Edges that go under another piece (like the ends of the handles) are not turned. Mark them with an extra line, either solid or dashed lines will do fine, just be consistent.
Draw and cut templates the same size as the patten. Rinsaway is polyester, so it's OK to use fabric scissors to cut out the templates.
Do not extend the ends of stems, leaves, petals or the like. Two layers of Rinsaway stacked on top of each other will form a bump.
In our basket example, the ends of the handle templates will butt up against the top edge of the basket.
Tips for cutting with scissors:
- Remember Kindergarten cutting? Hold the scissors stationary. Twist and turn the Rinsaway as you cut.
- For smooth applique templates, cut the whole length of your scissor blades. Don't make short choppy cuts.
- Jagged templates result in jagged applique shapes. Pay attention to how well you are cutting.
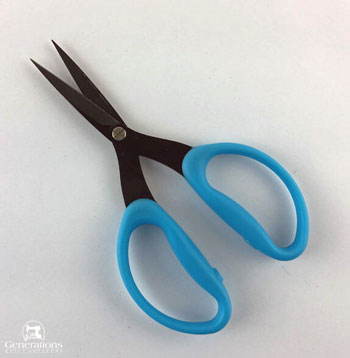
- I like to use scissors with a serrated edge—my 6" Perfect Scissors are my favorite for this task—they seem to grab the materials better.
Glue the Template to Your Fabric
I've tried many brands of glue but have found Elmer's Glue Stick to be the best fabric glue for the job.
 Liberally apply glue stick
Why Elmer's?
It's washable, acid free, non-toxic and been used for years by our kids.
It's tacky enough to hold seam allowances (SA) in place but has enough moisture to allow for the re-working of some edges.
To top it off, it's cheaper than specialty glues and available at sewing, drug and grocery stores making it readily available and easy to find.
TIP: I stock up during the 'Back to School' sales in later summer.
Don't be afraid to use the glue stick. Once the glue is dried the template becomes very stiff.
Perfect for our task!
Protect your work surface
Using your ironing board or a "Cut and Press" board?
Iron a sheet of freezer paper to your ironing surface, paper side up, of course!
Parchment paper—yes, the exact kind you get in the grocery store—provides a non-stick surface to press on.
Apply glue to the template
Place the Rinsaway template right side up on your work surface.
As shown above, liberally apply the Elmer's Glue Stick. The purple color makes it easy to see where the glue is applied. Cover the whole template.
Place the glued side of the template onto the wrong side of the chosen fabric. Fabric should be pre-washed and wrinkle free.
Be careful not to wrinkle the template. Gently smooth it with your fingers.
DO NOT SKIP THIS NEXT STEP!
Dry the glue with your iron
Trying to fold a seam allowance (SA) over applique templates damp with glue is like folding a seam allowance over a wet noodle.
It.Just.Doesn't.Work.
Protect your ironing surface and your iron's sole plate. Use scrap fabric, muslin, freezer paper or even parchment paper to cover your ironing surface. This will prevent a mess if any glue seeps out around the edges.
Lay your fabric and template on the ironing board, fabric on the board, un-glued side of the template facing up. Place a piece of parchment paper or an applique pressing sheet on top of this so that your iron will never touch the template.
With your iron on a cotton setting without steam and an up-and-down motion press this unit until the glue is dry.
The final result is a nice flat, rigid applique shape whose edges are easy to turn.
Repeat for all the pattern pieces.
Next is Part 2 of Preparing Applique Templates where you'll learn how to smoothly turn your seam allowances.


