- Home
- Free Quilt Block Patterns
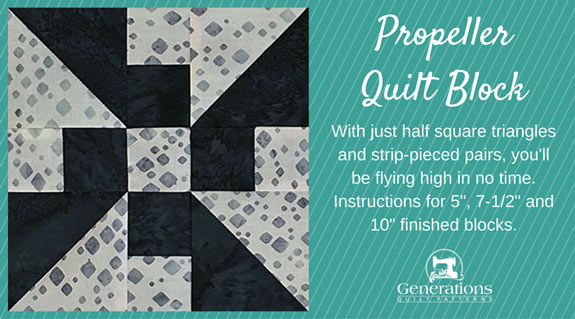
- Propeller Quilt Block
The Propeller Quilt Block
From our Free Quilt Block Patterns Library
This post contains affiliate links for which I receive compensation.
The Propeller quilt block is a great place to start to expand your piecing skills.
With just half square triangles and strip-pieced pairs, you'll be ready for take off in no time.
Here we'll use the quick pieced method for making those half square triangles.
Should you choose to make a whole quilt from this block, links are provided to other half square triangle techniques.
These other options will help you streamline the construction when you have more than one block to make.
The Propeller is spinning, we're ready for take off. Let's begin.
General Instructions
Several common abbreviations are used in this tutorial:
- RST - right sides together
- SA - seam allowance
- HST - half square triangle
Seams are all 1/4" and pressed toward the darker fabric unless otherwise noted.
I've used the Quick Quarter Ruler to mark the stitching lines on my HST. You can learn more about that tool here.
I've marked with my favorite, Bohin Mechanical Chalk Pencil. Learn more about that marking tool here.
Step 1: Cutting a Propeller quilt block
 Propeller design
Sample Size: 7½" finished / 8" unfinished
Grid: 5x5
Attribution: Ladies Art Company
AKA: Broken Arrows (Quilt World)
Design Type: Uneven 9-patch, small center, Pinwheel
Two fabrics are all you'll need for your Propeller block.
Here I've used two batiks.
One of the benefits of using a batik is that they take a press so well.
However, they can bleed.
I advise that you do a check for bleeding fabric before you begin if you're making a whole quilt from this block.
Good contrast between the colors and values is always a good thing when there's points in the design.
You always want your pointy piecing to show.
Click here to download a copy of the cutting chart and the block design to use at your cutting table.
 | Cutting Chart for a~Traditional Piecing ~ | |||||
|---|---|---|---|---|---|---|
| Patch | Fabric | Qty | Finished Block Size | |||
| 5" | 7½" | 10" | ||||
| 1** | Light | 2 | 2⅞" x 2⅞" | 3⅞" x 3⅞" | 4⅞" x 4⅞" | |
| 2** | Dark | 2 | 2⅞" x 2⅞" | 3⅞" x 3⅞" | 4⅞" x 4⅞" | |
| 3 | Light | 1 | 1½" x 7" | 2" x 9" | 2½" x 11" | |
| 4 | Dark | 1 | 1½" x 7" | 2" x 9" | 2½" x 11" | |
| 5 | Light | 1 | 1½" x 1½" | 2" x 2" | 2½" x 2½" | |
| Unfinished Block Size | 5½" | 8" | 10½" | |||
| Grid Size | 1" | 1½" | 2" | |||
| **I prefer to cut my patches extra large for HST, stitch, and then trim them to size. If you prefer to do the same, add a bit extra to the measurements for Patches #1 and #2 above (I added 3/8" to each dimension for the sample block). There is a chart further down in these instructions where you need it for trimming them to size. If you have a perfectly reliable 1/4" seam allowance use the dimensions in the cutting charts for this patches. | ||||||

These are the cut patches for our Propeller sample.
 While I marked the light #1 squares with a pencil and my quick quarter, I could have just as easily marked the darker #2 with my Bohin mechanical chalk pencil. You can compare their marks in the next photo.
Step 2: Assemble the Propeller units
 Make 4
Use a Quick Quarter ruler to mark two diagonal lines on the back of either the #1 or #2 square—whichever one it's easier to see the lines on.
These lines are 1/4" away from the center diagonal.
Here, I've marked the #2 with my white chalk Bohin marker.
 The marks were made with my Bohin Mechanical Chalk pencil—my favorite marking tool. An open toe applique foot is installed.
Stitch on the drawn lines. An open toe applique foot is perfect for this sewing because there's nothing blocking your view of the needle.
Helpful Hint
If you don't have this ruler, you can simply mark one diagonal line and then stitch a quarter inch from both sides of the line on both pairs of patches.
After stitching, press both pairs flat to set the seams.
Cut each pair in half between the stitching (below, left). You have four HSTs.
If you cut oversized patches like I did, you'll need to trim them down to size. (If you cut them exactly as instructed in the Cutting Chart, use this measurement to confirm they are the correct size. Trim away any dog ears.)
Find your 'Trim HST to...' size from the chart below.
| Hst Dimensions | ||
|---|---|---|
| Finished Block Size | Trim HST to… | |
| 5" | 2½" | |
| 7½" | 3½" | |
| 10" | 4½" | |
This is what your units look like during the process.
 Cut between the stitching (left), untrimmed (middle), and trimmed (right)
For more on this method for making HST, click here.
For other methods to efficiently make lots of HST, click here.

Side Pairs
Make 4
With your favorite quarter inch foot installed (mine has a guide on the right side), with RST, stitch the #3 and #4 strips together along the long edge.

Press, first as sewn, and then with the SA to the dark.
Use the chart below to check that your strip set is the correct width.
| StripSet Widths | ||
|---|---|---|
| Finished Block Size | Width after stitching | SubCut Width |
| 5" | 2½" | 1½" |
| 7½" | 3½" | 2" |
| 10" | 4½" | 2½" |
Make any adjustments.
Straighten one short side of the stripset by aligning a line on your ruler (white arrow) with the seam line. Trim off a complete slice as shown below.

Again from the chart above, find the 'SubCut Width' that corresponds to your finished block's size.
Subcut your stripset into four equal patches.
 Your strips were cut a bit longer than needed so there's approximately 1" of waste. A bargain for perfection, wouldn't you say?
Step 3: Assemble your Propeller quilt block
Lay out your patches as shown below.
Be careful to get the HST swirling around the center in the same direction. Here the dark corners all point their way around clockwise.

With RST, sew units in each row together.
SA are pressed toward the two patch center unit in every row to create seams that will nest when matched.

Stitch the rows together, pinning if it helps you to match the seams.
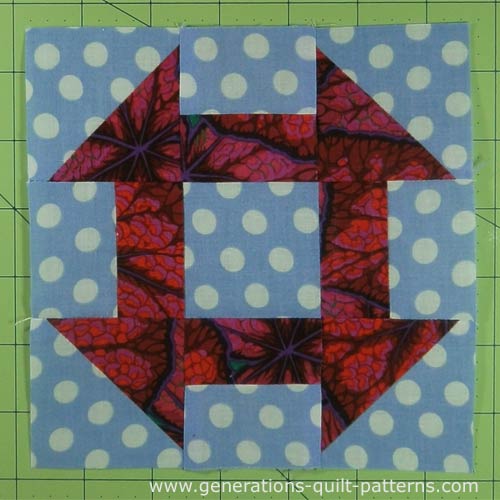
 Our completed Propeller quilt block
These last two seams are pressed out from the center.
That way if you choose to make a quilt of nothing but Propeller quilt blocks, and they are set edge-to-edge, all the seams will nest.
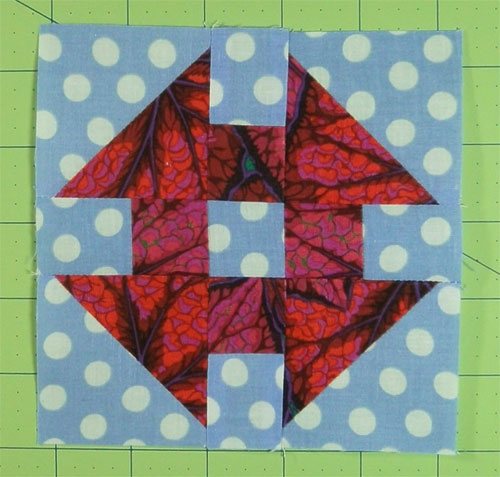
Here the block is from the backside.
 Our Propeller sample block from the backside
Quilt Blocks related to the Propeller design
Using these same patches—HSTs and strip-pieced pairs, you can make several other blocks.
You be the designer!
Churn Dash: 3x3 grid
Monkey Wrench, 5x5 grid
This looks almost identical to the Churn Dash above, doesn't it.
The difference is the two-patch is just one grid-unit wide. It's two for the Churn Dash.
Other variations include:
 Alaska Homestead
5x5 gird
 Greek Cross
3x3 grid
 Greek Square
3x3 grid
What about a different quilt block?
For a list of all the 215+ quilt block patterns on this site, start here.
If you know the name of the block, shorten your search by using these links:
Click here if you're looking for blocks with at least some paper piecing.
Click here if you're looking for the basic building blocks of quilting, i.e., Flying Geese, half square triangles, quarter square triangles, etc., along with several techniques to make each.
And finally, use these links to find blocks in these finished sizes:
For even more blocks to make...

For you, are quilt block designs like potato chips...
...you can't have just one?!!
Check the amazing resources I rely on for all the quilt block designs you see on this website.
To see if they're worthy of a spot in YOUR quilting library, CLICK HERE.


By Julie Baird
Copyright © 2008-2024 Generation Quilt Patterns, LLC
All Rights Reserved
Generations-quilt-patterns.com does not sell any personal information. (See Privacy Policy)