- Home
- Free Quilt Block Patterns
- Blocks and Pinwheels Quilt Block
Blocks and Pinwheels Quilt Block
From our Free Quilt Block Patterns Library
This post contains affiliate links for which I receive compensation.
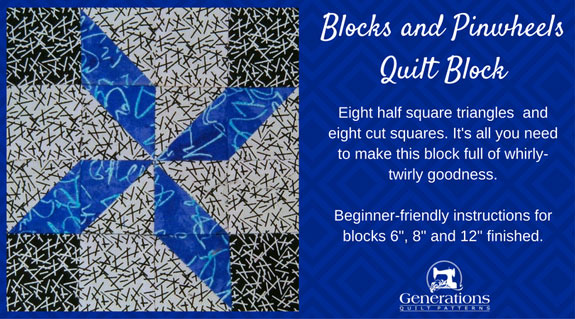
The Blocks and Pinwheels quilt block is chock-full of whirly-twirly goodness.
With nothing but half square triangles and cut squares, it's a dandy block to play with.
For our sample, the 8-at-a-time method for making half square triangles is a perfect match. Other than that the design contains nothing but cut squares.
Now if we could just jazz up the name a bit, eh?
Let's begin.
General Instructions
Seams are all 1/4" and pressed toward the darker fabric unless otherwise noted.
Several common abbreviations are used in this tutorial:
- RST - right sides together
- SA - seam allowance
- HST - half square triangle
When you press, do it first with the patch flat as it was sewn.
This sets the seam and helps meld the fibers of the thread with the fibers of the fabric together.
Then press your patches open from the front. This helps to avoid tucks pressed in at the seams.
Tucks are a pain in the derriere because they get in the way of your quilting—especially when you're trying to ditch quilt with your walking foot.
The newest quilt fabrics to tickle your fancy...
Click the images below to see the full collection. We share any commercial and/or free patterns that showcase them, too. (For inspiration, of course!)
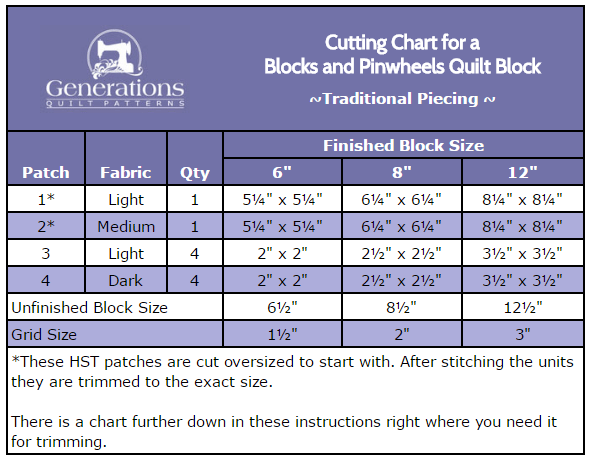
Step 1: Cutting patches for a Blocks and Pinwheels block
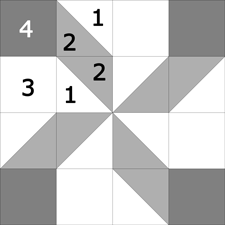 Blocks and Pinwheels design
Sample Size: 6" finished / 6½" unfinished
Grid: 4x4
Attribution: Old Chelsea Station
Design Type: Pinwheel, 4-patch, Uneven 9-patch, large center
The 8-at-a-time method is used to make our HSTs. If you choose to make a quilt entirely from this block, you may wish to use another method to mass produce them.
You'll find more ways to make HSTs here.
Step 2: Assemble the units for your Blocks and Pinwheels
Half Square Triangles (HST)
Make 8
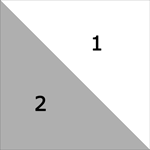 Make 8
Using the 8-at-a-time method for making HSTs, draw two diagonal lines on the back of either the #1 or #2 square. Choose whichever one is easier to see your markings on.
Install your favorite quarter inch foot, standard piecing stitch length.
With RST, layer #1 and #2, and stitch a quarter inch away from both sides of both lines.
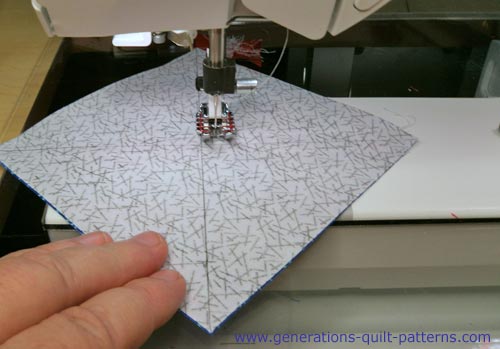 The marked diagonal lines need to be just dark enough for YOU to see. They appear a bit light in the photo, but were easy to see while I was stitching.
Press the sewn units flat to set the seams.
From the chart below, find the 'Center/MidPoint Measurement' that corresponds with the Finished Block Size you chose. We use this to cut the #1/#2 patch into four equal squares.
| HST Dimensions | ||
|---|---|---|
| Finished Block Size | Center/Midpoint Measurement | Trim HST to… |
| 6" | 2⅝" | 2" |
| 8" | 3⅛" | 2½" |
| 12" | 4⅛" | 3½" |
Move your sewn patches to your cutting mat. I like to use either my rotating mat or a smaller 12" x 18" mat for this so I can turn the mat and not disturb the patches while cutting.
Find the Center/MidPoint Measurement on your ruler. Align that measurement on the ruler with the edge of your block.
For this 6" sample block, the Center/MidPoint is 2⅝" (white arrow).
Cut the patch in half from top to bottom through its center as shown below.
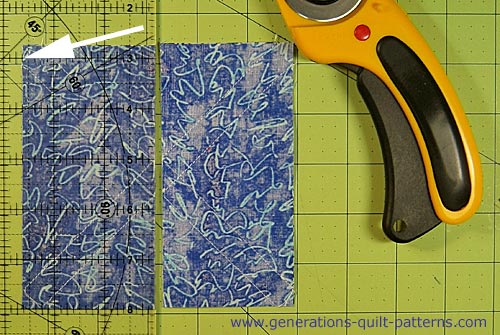 If you look closely, you can just make out the two lines of diagonal stitching.
Rotate your mat a quarter turn and repeat.
You now have four units, each with two diagonal lines of stitching through them that are equal to the Mid Point Measurement.
Cut these units in half between the diagonal lines of stitching to form eight HST.
Return to the chart above, this time use the 'Trim HST to...' column. Trim to perfection!
This is what you've got when finished.
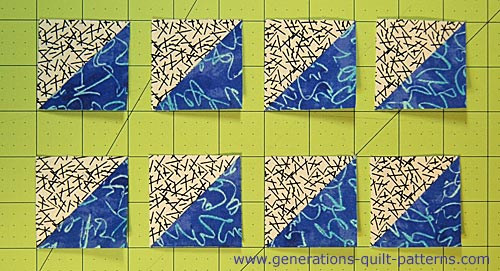
Click here for more detailed directions using this method to make HST.
Side Units
Make 4
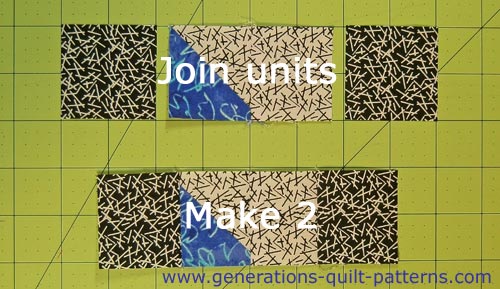
With RST, join a #1/#2 HST to a solid #3 square as shown below.
SA is pressed toward #3 to reduce bulk.
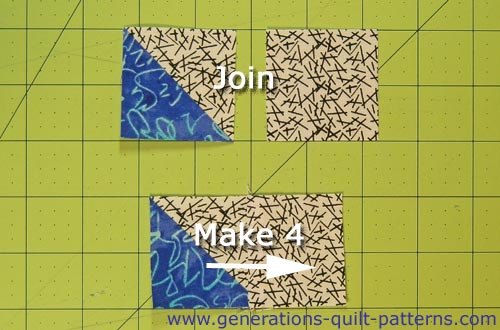
Set two of these two-patch units aside for Step 3.
For the two remaining, add a #4 corner square to both short sides.
Press, SA toward the center units.
Center Pinwheel
Make 1
Sew the four remaining HST into two pairs, pressing SA in the direction of the arrow. This is so that your seams will nest with the side unit you've already created.
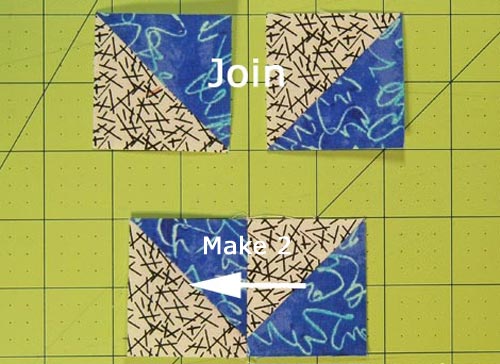
With RST, stitch the two pairs together so that they form a pinwheel design.
For a good match in the center, I like to put a pin straight through the points on both sides. (Click here for more information about pin matching points.)
I then insert a pin on both sides of the pin already through the points (white arrow).
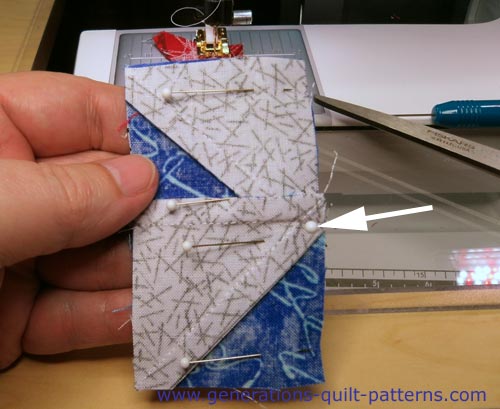 Feed these patches into your sewing machine so that the seam allowance is pointing towards your machine as shown above.
To finish up our center pinwheel, twirl the seam allowance in the center.
Do this by loosening the few stitches in the seam allowance—do not cut them away—and flatten the seams with your fingers. They will point clockwise around the center (as viewed from the backside).
Press into place.
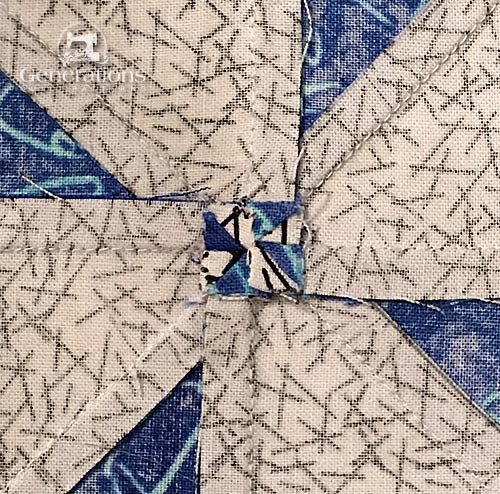 Closeup of the twirled seam allowance - see how it forms its own pinwheel in the center?
Step 3: Assemble your Blocks and Pinwheels quilt block
Arrange the patches for your Blocks and Pinwheels as shown below.
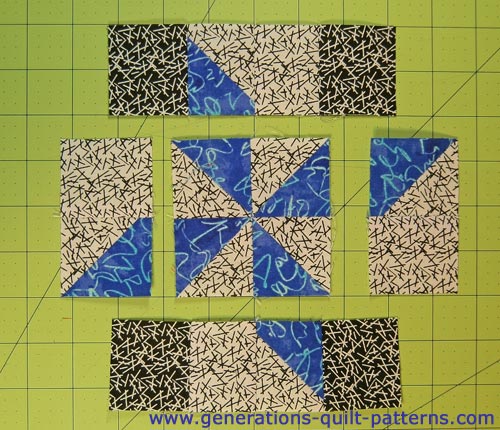
With RST, join the sides to the center pinwheel block.
SA are pressed in the direction of the arrows.
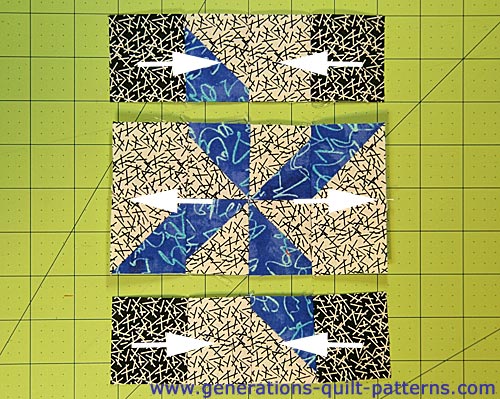
With RST, stitch the rows together. Use pins to help you keep points that should match lined up.
This is your finished Blocks and Pinwheels quilt block. There's a lot of movement in this design for just a handful of HSTs whirling around a center!
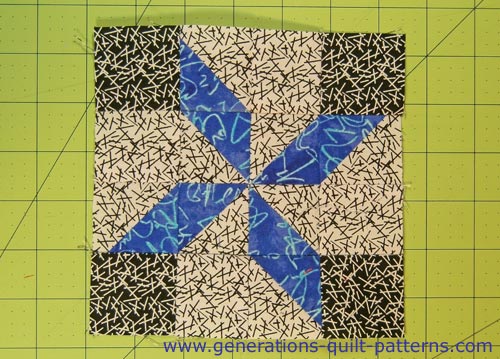 Our finished Blocks and Pinwheels quilt block—in all its whirly-twirly goodness!
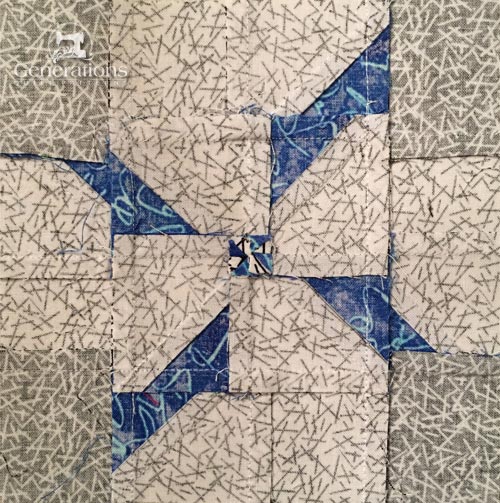
And finally our Blocks and Pinwheels from the backside. You can see how the seams all nest around the pinwheel unit.
What about a different quilt block?
For a list of all the 215+ quilt block patterns on this site, start here.
If you know the name of the block, shorten your search by using these links:
Click here if you're looking for blocks with at least some paper piecing.
Click here if you're looking for the basic building blocks of quilting, i.e., Flying Geese, half square triangles, quarter square triangles, etc., along with several techniques to make each.
And finally, use these links to find blocks in these finished sizes:
- Home
- Free Quilt Block Patterns
- Blocks and Pinwheels Quilt Block
