- Home
- Free Quilt Block Patterns
- Big O Quilt Block
Big O Quilt Block Instructions
A Partial Seams Patchwork Design
This post contains affiliate links for which I receive compensation.
Skill Level: Beginner
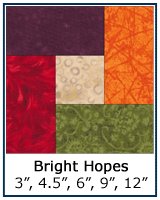
Our Big O quilt block is the second block in our series on the partial seams technique (the first is 'Bright Hopes').
This time we add connector corners at the end to change the look and create the 'O'.
If you'd prefer to skip partial seams, you can easily piece this block using the Shoofly block pattern. Simply change the color placement.
Big O looks terrific paired with an 'X' block, like the 'Cotton Boll', for a 'kisses and hugs' quilt. Perfect for a young child or new baby.
Let's get started!

General Instructions
Seam allowances (SA) are all 1/4" unless otherwise noted.
Pressing: First press with the patches in the closed position to set the seams, melding the thread into the fabric. Then open the patches and press with the SA towards the dark.
Pressing instructions are highlighted in yellow to make them easy to find.
The newest quilt fabrics to tickle your fancy...
Click the images below to see the full collection. We share any commercial and/or free patterns that showcase them, too. (For inspiration, of course!)


Step 1: Cutting for a Big O block
 Big O design
Sample Size: 6" finished / 6½" unfinished
Grid: 3x3
Design Type: Even 9-patch, Partial seams
Though I've shown this as a two color block, there's no reason you couldn't make it scrappy.
Just keep the color values close together in your light and dark fabric groupings.
The choice is up to you as the designer!
 |
Cutting Chart for a~ Traditional Piecing ~ | ||||||
|---|---|---|---|---|---|---|---|
| Patch | Fabric | Qty | Finished Block Size | ||||
| 3” | 4½” | 6” | 9” | 12” | |||
| 1, 3 | Light | 5 | 1½” x 1½” | 2”x2” | 2½” x 2½” | 3½” x 3½” | 4½” x 4½” |
| 2 | Dark | 4 | 1½” x 2½” | 2” x 3½” | 2½” x 4½” | 3½” x 6½” | 4½” x 8½” |
| Unfinished Block Size | 3½” | 4½” | 6½” | 9½” | 12½” | ||
| Grid Size | 1” | 1½” | 2” | 3” | 4” | ||

Step 2: Assembling the Big O quilt block
Unlike the Bright Hopes quilt block (the first in our partial seams series), this time the rectangles are added around the center square in a counter-clockwise fashion.
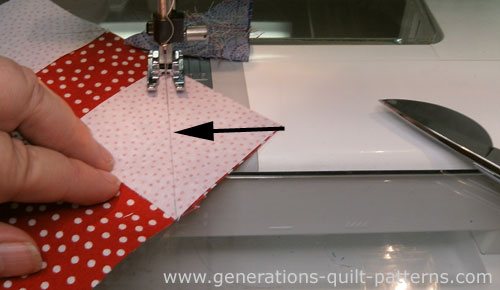
With right sides together (RST), align three sides of a #1 square with a #2 rectangle. We'll be stitching just half of the bottom side of this pair for now.
 Stitch a 1/4" seam from approximately the middle (short black line above) to the end of the patches.
Using the photo below as a guide, stitch on the bottom edge from the middle of #1 (the black arrow) to the edge. I do not backstitch at the start. These initial stitches are secured when you overlap your stitching at the end of adding the rectangles to the center square.

Here you can see my red stitching...

Press.
With RST, align the edges of the pieced #1/#2 with another #2. Stitch from edge to edge. No more partial seams to stitch until the last of the rectangles is added.
 The black arrow points to the first partial seam in red.
After sewing and pressing two #2s, the unit looks like this...

Add the last two #2s in the same manner. Remember to press after each.
At this point your Big O looks like this.

All that's left is to sew the remainder of the first #2. Use pins if it helps.
Sew, remembering to overlap your stitches by a 1/4" or so (the black arrow).

Press.
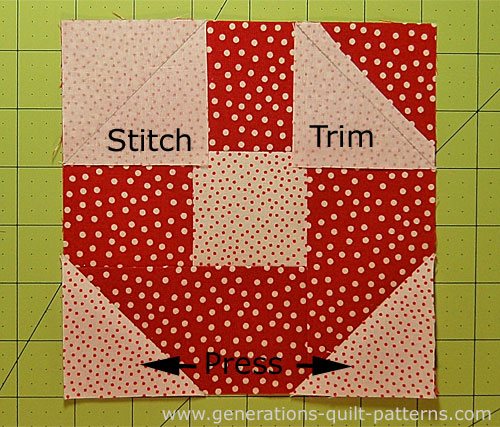
To finish the Big O, we'll use the connector corners technique.
Draw a diagonal line on the backside of all four #3 squares.
With RST, align one square in a corner and stitch on the line (black arrow). Notice I've switched to my open toe applique foot. It's easier to see the line and where my needle is going!
Repeat for the remaining corners.
Trim the SA a 1/4" from your stitching, on the side closest to each corner. Below you can see the process.
Finish by pressing just like in the two lower corners.
That's it! Your Big O Quilt Block is finished and ready for your quilt!

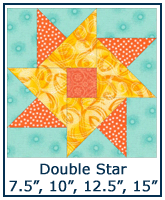
Other blocks that use Partial Seams piecing
Once you learn a new technique, it's a good thing to practice it a bit. That helps commit it to memory.
Below are more blocks on this site that use this technique. Click the image to go to the directions to make it.
What about a different quilt block?
For a list of all the 215+ quilt block patterns on this site, start here.
If you know the name of the block, shorten your search by using these links:
Click here if you're looking for blocks with at least some paper piecing.
Click here if you're looking for the basic building blocks of quilting, i.e., Flying Geese, half square triangles, quarter square triangles, etc., along with several techniques to make each.
And finally, use these links to find blocks in these finished sizes:


Yummy fabrics
to drool over
Click any image below to see the full collection and find pricing and ordering information.


By Julie Baird
Copyright © 2008-2024 Generation Quilt Patterns, LLC
All Rights Reserved
Generations-quilt-patterns.com does not sell any personal information. (See Privacy Policy)